
Group Members Manual
Groups.io provides people who share common interests with an ad-free platform for communicating with each other through email groups and group websites.
Three levels of plans are available in Groups.io: Free, Premium (paid; however, a free trial is available), and Enterprise (paid). Free groups provide only basic functions related to sending, storing, and managing messages. Premium and Enterprise groups provide additional collaboration features such as calendars, databases, and wikis.
Depending on the plan level of the group and the features and permissions enabled by the group’s owner, members of a Groups.io group can:
- Send messages to the group either through the group’s website or by email.
- Use the group’s web-based collaboration features:
- Calendar
- Chats (similar to chat rooms on other platforms)
- Files
- Databases
- Photos
- Polls
- Wiki
For more information about the features and benefits of Groups.io, see the Features page on the Groups.io website. You can also view an Overview video.
Groups.io provides several ways that prospective members can join (subscribe to) groups:
- Find a group in Groups.io’s public list of groups and submit a request to join.
- Receive and respond to an invitation from a group owner or moderator to join the group.
- Receive a notice from a group owner or moderator that you have been directly added to a group.
- Send an email message to the group’s subscription email address.
Group owners set the default email message delivery method for their groups. However, after you join a group, you can select a different delivery method for that group’s email messages as well as use other options to help you manage messages. See Subscription page.
Group owners and moderators can invite prospective members to join their groups by sending email invitations. In many cases, such groups will not be listed in the public directory on Groups.io.
If you receive an emailed invitation to join a group:
- The subject line of the email message probably will be “[group subject tag] Invitation to join the groupname@groups.io group” (with the group’s subject tag at the beginning and the group’s name in place of groupname). However, the subject line might be different if the group’s owner has customized the invitation notice.
- The sender will be listed as Groups.io Notification.
- A personal note from the group owner or moderator who sent the invitation might be included in the text of the message.
- You can accept the invitation by replying to the email or clicking a link to accept the invitation on the group’s website. Be aware that the link will expire 14 days after the invitation was sent.
Note:
- If you do not already have a Groups.io account when you accept an invitation to join a group, you will receive an email from Groups.io asking you to confirm your subscription.
- If a group owner or moderator informs you that they invited you to join the group, but you have not received the invitation email, check the spam folder in your email application. If the invitation ended up in that folder, ensure that you mark it as not spam so your email provider’s filters will start learning to accept messages from the groups.io domain as legitimate.
Groups.io maintains a directory of publicly listed groups that you can search to find groups you might be interested in joining. When you find a group you are interested in, you can submit a request to join it:
- In the blue header at the top of any Groups.io page, click or tap the Find or Create a Group link in a desktop or mobile browser or the Find a Group link in the mobile app.
Note: On a mobile device, you might need to use landscape orientation to see that link in the blue header. In portrait orientation, you can tap your profile photo (or the generic icon if you have not set a profile photo) on the right side of the blue header and then select Find or Create a Group or Find a Group from the dropdown menu. - On the Publicly Listed Groups page that appears, look for a group that you are interested in. You can use these methods to narrow the list:
- Enter keywords in the Search field at the top and then click or tap the Search button.
- Use the left menu options to filter the list of groups:
- Most Popular
- Most Active
- Newest
- By Name
Note: In portrait orientation on a mobile device, scroll to the bottom of the page to see those options.
- When you find a group that you want to join, click or tap its link to go to its home page on Groups.io.
Restriction: Someone who has been banned from a group that they want to join will be unable to get to that group’s home page while they are logged in to Groups.io.
- On the group’s home page, look for a button you can click or tap to join the group:
- If it is an unrestricted group that anyone can join without requiring approval from the group’s moderators, the button is labeled Join This Group.
- If it is a restricted group that requires membership requests to be approved by the moderators, the button is labeled Apply For Membership In This Group.
Note: If a Join button or Apply button is not there, the group’s owner has chosen to disable the ability to join the group from its home page.
- Click or tap the button and follow the subsequent instructions.
Tip: If the Group Settings section on a group’s home page states “Archive is visible to anyone,” the Group Information section on that home page will contain a link to the group’s RSS feed. (See the Group_Help group for an example.) You can subscribe to that group’s feed using your RSS feed reader/application of choice, without joining the group. However, you will not be able to add topics or reply to topics unless you become a member of the group.
If you have been given the subscription email address for the group, or you happen to know the group’s name, you can send an empty email message to the subscription address to join the group (or request membership, if the group is restricted). The format of the subscription email address is:
groupname+subscribe@groups.io
(Substitute the actual group name for groupname.)
! Important: After you send a message to a group’s subscription email address, you will receive a confirmation request message from Groups.io. You must respond to that confirmation request to complete your subscription and join the group.
Tip: For other email addresses you can use for actions related to your group membership, see Standard group email addresses.
Note: If the group’s owner has chosen to disable the ability to join the group by email, you will receive a delivery failure notification.
In Premium and Enterprise groups, owners and moderators can add members directly without having to send invitations and wait for responses. If you receive an email message with a subject line of “You have been added to the groupname@groups.io group,” the group’s owner or a moderator has added you directly to that group.
Note: The email message contains a link that you can click to remove yourself from the group in case the addition was a mistake.
In certain situations, you will receive an email message from Groups.io asking you to reply to complete your subscription. The situations that generate this message are:
- You do not have a Groups.io account, and you click or tap a Join This Group button on a group’s website.
- You do not have a Groups.io account, and you accept an email invitation to join a group.
- You have a Groups.io account but you are not logged in to it, and you click or tap a Join This Group button on a group’s website.
- You are logged in to a Groups.io account but you do not yet belong to any groups, and you click or tap a Join This Group button on a group’s website.
- You send an email request to join a group that is restricted (that is, a group owner or moderator must approve membership requests).
- You change the email address in your Groups.io account.
- You create a new Groups.io account.
The subject line of the email message is “Confirm your Groups.io subscription.”
! Important: You must reply to that message to verify your email address and complete your subscription. You do not need to include any additional text in your reply.
Note:
- If you do not respond to the “Confirm your Groups.io subscription” message, you will not receive group messages or have access to the group’s website on Groups.io.
- After you belong to at least one group, you will not receive “Confirm your Groups.io subscription” messages for additional groups that you join by using the Join This Group button on those groups’ websites.
Tip: If you think you should be getting group messages but you are not receiving any, check the spam folder in your email application in case a “Confirm your Groups.io subscription” message was routed there mistakenly by your email provider.
Premium and Enterprise groups (plus Free groups that existed before January 15, 2020, 9:00 a.m. U.S. Pacific Time) can have subgroups. A subgroup is a group within another group and contains a subset of the members of the parent (main) group.
Subgroups have all the functionality of normal groups, but for you to be a member of a subgroup, you must first be a member of the parent group. If you join a group that has subgroups, the group’s owner or moderator will determine whether to include you as a member of any subgroups and invite or add you to them accordingly. You also might be allowed to join a subgroup on your own, depending on the group’s settings.
Note: If you receive an invitation to join a subgroup and you are not a member of the parent group, you will be added to the parent group automatically when you accept the subgroup invitation.
Related help topic
If you decide you no longer want to be a member of a group, you can use any of these methods to leave (unsubscribe from) that group:
- Click or tap the Unsubscribe link in the footer of an email message from that group.
- Send an email message to the group’s unsubscribe address (see Standard group email addresses).
- Go to the group’s website, display your Subscription page, go to the bottom of that page, and click or tap the Leave Group button.
- Go to the Your Groups home page, select the checkbox next to the group you want to leave, click or tap the Actions button at the bottom of the page, and select Unsubscribe.
A Groups.io account is identified by your email address and is an online record of this Groups.io information associated with that email address:
- Which groups you belong to at that address
- Your Groups.io password (if you set one) or social login method (if you use one) for that address
- Preferences and settings that apply to all the groups you belong to at that address
If you do not have a Groups.io account when you join your first Groups.io group, a Groups.io account is created for you automatically and associated with the email address you used to join the group. Alternatively, you can create a Groups.io account before you join any groups using that email address (see Creating a Groups.io account).
Note: If you use different email addresses to join different groups, you will have a different Groups.io account associated with each email address. However, you can be logged in to only one Groups.io account at a time—unless you use separate web browsers or special browser features to separate the cookies used in different browser windows.
! Important: With the exceptions of “Confirm your subscription” messages and “Your Groups.io Account is Bouncing” notifications, Groups.io will not send you unsolicited email messages asking you to authenticate your Groups.io account by clicking a link. If you receive an email that requests Groups.io account authentication and it is not one of the exceptions mentioned above, it could be a phishing email and you should not click any links in it.
Tip: A good practice is to examine the link’s underlying URL. If the URL is not from groups.io, the message could be a phishing attempt. (In desktop web browsers, the URL typically is displayed at the bottom left of the browser window when you hover your pointer over a link. In the message window of an email application, the URL might appear in a popup. If you are not sure now to display a link’s underlying URL, check your browser’s or email application’s online help.)
Restriction: This feature is available only through a desktop browser or mobile browser. It is not available in the Groups.io mobile app due to rules imposed by Google Play and the Apple App Store.
If you do not already have a Groups.io account, you can create one:
- Go to https://groups.io/register.
- On the Join Groups.io page, use one of these methods to create the account:
- Complete the Email address and Password fields, then click or tap the Create An Account button.
Note: Groups.io does not require you to set a password for your account. You can get an email link to log in or you can set up a passkey. See Logging in to your account. - If you would prefer to log in to Groups.io through a Facebook or Google account, click the appropriate button (in a mobile browser, you might have to scroll down to see the buttons), and follow the subsequent instructions.
- Complete the Email address and Password fields, then click or tap the Create An Account button.
Tip: See also the demonstration video on logging in to Groups.io.
To use any of the web-based features and have access to all the content of groups you belong to, you must be logged in to your Groups.io account. You can be logged in to your Groups.io account on multiple devices at the same time; you do not need to log out on one device before you log in on another one.
You can log in to your account using any of these methods:
- Through an emailed link (password not required)
Groups.io does not require group members to set account passwords. If you create an account but do not set a password at that time, you can have Groups.io email you a link that you can use to log in to your account. The login is valid for up to 30 days if cookies are retained on that device (see the note below).
To log in to your Groups.io account using an emailed link:
- In a web browser, go to https://groups.io/sendloginlink.
- In the Email Address field, enter the email address of the account you want to log in to.
- Click or tap the Email me a link to log in button.
- When you receive the email message (the subject is “Link to log into Groups.io”), click or tap the login link provided in the message. You are logged in to Groups.io, and your Groups.io home page is displayed on the website.
! Important: The login link in the email message expires after 24 hours.
After you log in to your Groups.io account on a particular device or browser, you stay logged in for at least 30 days. The login period is managed by a cookie stored in your browser. If your browser or device does not accept cookies, you will not be able to use individual group websites except to browse public areas.
Note:
- The login cookie expires in 30 days, but each visit to a group website extends the 30-day timeout period.
- If you delete your browser cookies (or your security software deletes them), you will be logged out.
- If your browser is set to delete cookies on exit, you will be logged out.
- If your browser is set to Private Browsing, you must log in again.
- With a passkey (password not required)
Restriction: In the Groups.io mobile app, it is not possible to log in using a passkey. On a mobile device, use a mobile browser to log in using a passkey.
- Go to the Groups.io website and click or tap the Log In link at the top right of the blue page header.
Tip:- On a mobile device, use landscape orientation to see the Log In link. Or in portrait orientation, tap your profile picture (or the generic profile icon if you have not set a picture) on the right side of the blue page header and then select Log In from the dropdown menu.
- You can use this link to go directly to the login page: https://groups.io/login
- On the resulting login page, click or tap the Log In with Passkey button.
- Complete the prompts to log in with your passkey.
Related help topic
- Go to the Groups.io website and click or tap the Log In link at the top right of the blue page header.
- With your email address and password
If you set a password for your Groups.io account, you will not have to deal with your login cookie expiring every 30 days. For instructions, see Setting, changing, or deleting your password.
To log in to your account with your email address and password:
- Go to the Groups.io website or open the mobile app, and click or tap the Log In link at the top right of the blue page header.
Tip:- On a mobile device, use landscape orientation to see the Log In link. Or in portrait orientation, tap your profile picture (or the generic profile icon if you have not set a picture) on the right side of the blue page header and then select Log In from the dropdown menu.
- You can use this link to go directly to the login page: https://groups.io/login
- On the resulting login page, enter your email address and password.
- Click or tap the Log In button.
- Go to the Groups.io website or open the mobile app, and click or tap the Log In link at the top right of the blue page header.
- Through Facebook or Google
Restriction: In the Groups.io mobile app, it is not possible to log in through Facebook or Google due to rules imposed by the Apple App Store and Google Play. To log in through Facebook or Google on a mobile device, use a mobile browser.
If you have a Facebook or Google account and prefer to log in to Groups.io through that account:
- Go to the Groups.io website and click or tap the Log In link at the top right of the blue page header.
Tip:- In a mobile browser, use landscape orientation to see the Log In link. Or in portrait orientation, tap your profile picture (or the generic profile icon if you have not set a picture) on the right side of the blue page header and then select Log In from the dropdown menu.
- You can use this link to go directly to the login page: https://groups.io/login
- On the resulting login page, click or tap the Log In with Facebook button or the Log In with Google button, as applicable.
Note: You might need to enable the setting in your Groups.io account that allows you to log in through Facebook or Google. See Setting or changing your social login preference.
- Go to the Groups.io website and click or tap the Log In link at the top right of the blue page header.
You can use any of these methods to display your Groups.io account settings:
- In a browser, go to https://groups.io/settings. (If you are not logged in to Groups.io, you will be prompted to log in, and after you log in, your account settings are displayed.)
- Desktop browser: When you are logged in to Groups.io, click your display name or email address at the upper right of a group’s web page, then select Settings from the dropdown menu.
- Mobile device:
- Landscape orientation: When you are logged in to Groups.io, tap your display name or email address at the upper right of a group’s web page, then select Settings on the dropdown menu.
- Portrait orientation: When you are logged in to Groups.io, tap your profile picture (or the generic icon if you have not set a profile picture) in the Groups.io page header, then select Settings on the dropdown menu.
About Groups.io profiles
In Groups.io, you have a member profile for your overall account as well as a separate profile for each individual group that you belong to.
Information that is in your account profile is automatically applied to your individual group profiles, but you can change the information in your group profiles. For example, you might want to display different profile information for different types of groups you belong to such as hobby groups, community groups, professional interest groups, general interest groups, and so on.
Customizing your overall Groups.io account profile
- Display your account settings page.
- Desktop browser: In the left menu, select Identity.
Mobile device: Tap the Identity icon at the bottom of the page.
A page appears with your overall Groups.io account profile information. - Complete your account profile as desired (all elements are optional except for Profile Privacy):
- Profile Photo
Use the Browse button to select a photo to associate with your profile.
- Username
Usernames can be @mentioned in Groups.io chat messages. If you want to have a username in Groups.io, enter a unique, short name with no punctuation or spaces. This name appears with an at sign (@) in front of it and is shown after your display name (if you set one) in individual group profiles.
Note: This username applies to all your individual group profiles as well. You cannot change it in those profiles.
- Display Name
Enter the name you want listed with your messages (for example, your first and last names). In a dekstop browser, and on a mobile device in landscape orientation, this name also appears as your account name at the upper right of group pages.
Note:
- This field might be populated automatically with the name from your incoming email header (if the header contains that information) the first time you post a message to the group by email. You can change the name here and it will be used in all subsequent messages that you post to groups. Changes in this field do not affect the email header in your email application.
- The name you enter here is displayed in all the groups you belong to at this email address. If you want to use a different display name in an individual group, customize your profile for that group (see below).
- Group owners and moderators can change the display names of members in their groups. Such changes affect only those groups; the display names in members’ account profiles are not affected.
- Profile Privacy (required)
Select who can see your profile information:
- Only group owners & moderators
- Other members of your groups
- Public
Note: This setting also controls whether your profile is listed in the member directories of the groups you belong to. You can change it for individual groups by customizing your profiles for those groups (see below).
- Bio
Enter and format text that explains who you are (or whatever information you want to provide).
Note: If you want to provide a signature that is added to messages you post to groups from group websites, you can do so on the Subscription page for each group.
- Location
Enter your location.
- Website
Enter the URL of your personal website.
- Profile Photo
- Scroll to the bottom of the page and click or tap the Update Overall Profile button.
Note: Changes you make to your overall profile also are applied to the corresponding fields in your individual group profiles unless you previously customized those fields in those profiles. You can go to a group profile to edit those customized fields.
Customizing your profile for an individual group
- Display your account settings page.
- Desktop browser: In the left menu, select Identity.
Mobile device: Tap the Identity icon at the bottom of the page. - On the resulting page, click or tap the Overall Profile button at the top to display a dropdown list of your groups, then select the group for which you want to customize your profile.
- Complete your group profile page as desired. See the instructions above for customizing your overall profile.
Note: If additional fields are shown under the Website field, the group is a Premium or Enterprise group and the group’s owner has provided custom fields for members of that group to complete. Some of those fields might be required. If an additional field is labeled GitHub Identity (or something similar), see Linking your GitHub profile to a group. - Scroll to the bottom of the page and click or tap the Update Group Profile button.
Tip: You can click or tap the Reset Group Profile button to set all fields back to the information that is in your overall account profile.
Tip: Another way to get to your profile for an individual group is to go to that group and select Subscription > Group Profile from the left menu (in a desktop browser) or the More menu (on a mobile device). Then click or tap the Edit Group Profile button to customize that profile.
Setting or changing your password
If you did not set a password when you created your Groups.io account and later decide to set one, or if you want to change an existing password:
- Display your account settings page and select Login (if that page is not displayed already).
- In the Login panel at the top of the page, in the New Password field, enter your new password. It must be at least 6 characters long.
- Click or tap Set Password (if you are setting a password for your account) or Change Password (if you are changing an existing password).
Tip: The main advantage of setting a password for your Groups.io account is so you do not have to deal with your login expiring in 30 days (see Logging in to your account > Through an email link (password not required) ).
Deleting your password
If you have a Groups.io password and later decide you no longer want to use a password to log in to Groups.io, you can delete your password:
- Display your account settings page and select Login (if that page is not displayed already).
- In the Login panel at the top of the page, under the New Password field, click or tap Delete Password.
Groups.io deletes the password and displays a banner at the top of the page stating that your password has been deleted.
Note: It is not possible to delete your password if two-factor authentication (2FA) is enabled in your Groups.io account.
Related help topics
Setting or changing your social login preference
Setting your language, time, and date display preferences
Setting your preferred text editor
Setting the number of items to show on group web pages
Setting up passkeys for logging in
Seeing copies of your own messages that you email to groups
In your Groups.io account, you can set display preferences that apply to all of the groups you belong to at that email address:
- Display your account settings page.
- Desktop browser: In the left menu, select Preferences.
Mobile device: Tap the Prefs icon at the bottom of the page. - On the resulting page, in the Display Preferences panel, change the desired preference:
- Language
Set the language in which Groups.io user interface elements and notifications will be displayed. From the list, select the language you want to use.
Note: If you notice any translation errors, or if you are interested in contributing to Groups.io’s internationalization efforts, see Language Support.
- Timezone
Set the timezone used for displaying times on group websites. From the list, select the timezone you want to use.
- Time Display
Display times on group websites using a 12-hour clock or a 24-hour clock. From the list, select the hour format you want to use.
- Date Display
Set the display of numeric dates on group websites. From the list, select the date format you want to use.
- Monday Start
Select this checkbox if you want the week in group calendars to start on Monday instead of Sunday.
- Language
- Go to the bottom of the page and click or tap Update Preferences.
Related help topics
You can specify your preferred text editor for composing messages, creating member notices, entering calendar events, and creating or editing wiki pages on group websites:
- Display your account settings page.
- Desktop browser: In the left menu, select Preferences.
Mobile device: Tap the Prefs icon at the bottom of the page. - On the resulting page, scroll down to the Editor Preference panel.
- From the list, select the editor you want to use for composing text on group websites:
- HTML
Select this editor to compose text in HTML using a full-featured editor that includes a formatting toolbar.
Note: If you join a group that the owner has set to Plain Text Only, your message composition page will not use the HTML editor. - Markdown
Select this editor to compose text in a markup language that looks and works like plain text as you edit it. Markdown uses particular characters or sequences of characters to represent formatting such as bold, italic, bulleted and numbered lists, links, and headings. With this editor, the only buttons available on the text formatting toolbar are Quote Whole Post and Add Attachments.
- Plain Text
Select this editor to compose text with no additional formatting.
- HTML
- Go to the bottom of the page and click or tap Update Preferences.
Related help topics
You can specify whether Groups.io pages are displayed in dark mode (light text on a dark background):
- Display your account settings page.
- Desktop browser: In the left menu, select Preferences.
Mobile device: Tap the Prefs icon at the bottom of the page. - On the resulting page, scroll down to the Dark Mode panel.
- From the list, select your dark mode preference:
- Go to the bottom of the page and click or tap Update Preferences.
Related help topics
You can specify the number of items to show in lists on group web pages:
- Display your account settings page.
- Desktop browser: In the left menu, select Preferences.
Mobile device: Tap the Prefs icon at the bottom of the page. - On the resulting page, in the Items Per Page list at the bottom of the Display Preferences panel, select the number of items—20, 50, 100, or infinite scroll—you want to see in lists of those items on group web pages.
- Go to the bottom of the page and click or tap Update Preferences.
This setting affects pages that display lists of:
- Messages
- Topics
- Files
- Photos
- Database table rows
- Members
- Hashtags
Note: The infinite scroll setting might not be usable on all pages (for example, database tables). In such cases, the items listed per page will revert back to 20 items.
Related help topics
Instead of using a password to log in to your Groups.io account, you can set up passkeys. A passkey is a secure alternative to a password. Passkeys use your device’s biometric authentication (Touch ID, Face ID, Windows Hello) or security keys.
You can set up different passkeys on different devices. Passkeys remain on the device and are never shared with websites or apps, making them resistant to cybersecurity attacks.
To set up a passkey:
- Display your account settings page.
- Desktop browser: In the left menu, select Security.
Mobile browser: Tap the More icon at the bottom of the page, then tap Security on the More menu.
Note: On a mobile device, you must use a browser to set up a passkey. It is not possible to set up a passkey in the Groups.io mobile app. - On the Security page, in the Passkeys panel, click or tap the Add Passkey button.
- In the Add Passkey popup, enter a name for the passkey and then click or tap the Add Passkey button.
- Complete the prompts to choose a device (if applicable) and save your passkey to the device. The passkey is now listed in the Passkeys panel on the Security page.
To delete a passkey, follow steps 1 and 2 above, then click or tap the Delete button next to the passkey you want to delete.
Overview
If you log in to Groups.io with your email address and a password, you can set up two-factor authentication (2FA) to protect your Groups.io account with an extra level of security.
Note: If you are logged in to Groups.io through Facebook or Google, you cannot set up two-factor authentication. You must log out of Groups.io and then log back in using your email address and a password.
! Important: Once you enable two-factor authentication, you will not be able to log in to Groups.io through a social login (Google or Facebook) or by using the Groups.io function to email you a link to log in.
Setting up 2FA
- Display your account settings page.
- Desktop browser: In the left menu, select Security.
Mobile device:Tap the More icon at the bottom of the page, then tap Security on the More menu. - On the Security page, in the Two-Factor Authentication panel, click or tap the Set Up Two-Factor Authentication button.
- In the Enable Two-Factor popup that appears, enter your Groups.io account password and click or tap the Enable button.
- On the resulting page:
- Follow the instructions to configure your authenticator app to receive security codes from Groups.io.
- Enter the security code from your app.
- Click or tap the Validate button.
You are returned to the Security page, and a green banner at the top states that two-factor authentication is now set up.
- On the Security page, click or tap the View your recovery codes link, and save the resulting list of recovery codes in a safe place. If you lose access to your device and cannot receive two-factor authentication codes, you will need a recovery code to access your Groups.io account.
Note: If the authentication code is lost (for example, if a device is reset to factory settings), and you no longer have your recovery codes, you must contact Groups.io Support to be able to log in.
Disabling 2FA
- Display your account settings page.
- Desktop browser: In the left menu, select Security.
Mobile device: Tap the More icon at the bottom of the page, then tap Security on the More menu. - On the resulting page, click or tap the Disable two-factor authentication button.
- In the Verify Disable Two-Factor popup that appears, enter your Groups.io account password and click or tap the Disable button. You are returned to the Security page, and a green banner at the top states that two-factor authentication has been disabled.
Some email providers—notably Gmail—do not show their users copies of the messages that those users send to Groups.io groups through email. If (a) you use one of those providers, (b) your Groups.io email delivery option is set to Individual Messages, and (c) you want to ensure that you see copies in your email application of messages that you have emailed to your groups, follow these steps:
- Display your account settings page.
- Desktop browser: In the left menu, select Preferences.
Mobile device: Tap the Prefs icon at the bottom of the page. - Scroll to the Email Preferences panel near the bottom of the page.
- Under My Messages, select the I always want copies of my own emails checkbox.
Note: This checkbox is selected by default in new Groups.io accounts. If you do not want to see copies of your own messages, clear this checkbox. - Click or tap the Update Preferences button at the bottom of the page.
For those interested in the technical details: When this checkbox is selected, Groups.io replaces the Message-Id header with a new, system-generated one and renames the original Message-Id header to X-Orig-Message-Id.
Related help topics
To change your email address:
- Log in to your Groups.io account if you are not already logged in.
- Display your account settings page and select Login (if that page is not displayed already).
- In the Login panel at the top of the page, in the New Email field, enter your new email address.
- Click or tap the Change Email button.
- In the Verify Email Change popup that appears:
- ! Important: Carefully review the new email address, which is displayed in bold, and ensure that it is correct.
(If it contains a typo or other error, click or tap Cancel to return to the Login page, then reenter the new address and click or tap Change Email again.) - If you are certain that the new email address is correct, click or tap Yes. Groups.io sends a confirmation email to the new address.
- ! Important: Carefully review the new email address, which is displayed in bold, and ensure that it is correct.
- When you receive the confirmation email from Groups.io at the new address, reply to that email to confirm the change.
Note:
- This change applies to all groups you are subscribed to at the original email address.
Tip: If you want to change the email address for only one group, you will need to create a new Groups.io account with the new address, then subscribe to the group from that address. You will also need to unsubscribe your old address from that group so that you receive its messages only at your new email address. - If the new email address is already registered with Groups.io, a page appears that explains the account merge process and prompts you to verify that you want to merge your Groups.io accounts.
If the email provider you use for your Groups.io account sends your outgoing messages from an address that is different from your account address, or if you want to be able to send messages to groups from an additional address (for example, a work address) that is different from your account address, you can add an email alias to your account:
- Log in to your Groups.io account if you are not already logged in.
- Display your account settings page and select Login (if that page is not displayed already).
- At the bottom of the page, click or tap Advanced Settings for Email Addresses to expand that panel.
- In the Email Alias field, enter the address you want to be able to send messages from.
- Click or tap the Add Email Alias button. That address is now listed under Email Aliases.
Note:
- You will not receive group messages and notifications at addresses that you set up as email aliases. Group messages and notifications are sent only to the email address that is registered with your Groups.io account.
- If you add an email alias, you can log in to your Groups.io account using that alias, just as you would with your account address. You will be logged into Groups.io as though you had logged in through your account address. Logging in to Groups.io through an email alias that is linked to your account address does not create an additional Groups.io account.
- To delete an alias, click or tap the X next to it.
Related help topics
If you make an error (such as a typo) when you change the email address for your Groups.io account, you can try these steps to recover your account and correct the email address:
Note: These steps assume that you have a password set for your Groups.io account.
- Log out of your Groups.io account.
- Log in to Groups.io using the misspelled email address and your original password—that is, the one associated with your correct email address.
Note: You cannot use the “Email me a link to log in” option on the Log In page because the link will be sent to the misspelled email address, which presumably does not exist (or possibly could belong to someone else). - Go to your Groups.io account settings and change the email address to the correct one.
Tip: If you are not sure what the misspelled email address is (for example, you do not remember what the typo was) so you can enter it in step 2 above, you can try contacting the owner of a group you belong to and asking them to tell you what email address is associated with your membership. Send an email to groupname+owner@groups.io (substituting the actual group’s name for groupname). If the group is a Premium or Enterprise group, you could ask the group’s owner to correct your email address for you. In Free groups, owners cannot change members’ email addresses.
If you have two (or more) Groups.io accounts, you can merge them into one account so you can access all your groups from one account. The merge will deactivate and delete all your accounts except the one you are merging the other account(s) into.
Note: If you own any groups under an account you want to deactivate, your ownership will be moved to the account you are merging the other account into. That is, you will not lose ownership of groups you own under the account being deactivated.
To merge accounts:
- Log in to the Groups.io account that you want to deactivate (that is, the account you want to merge into another account).
- Display the account settings for that account.
- In the New Email field, clear the address that is there, and enter the email address of the destination account (the one that you want to merge this account into).
- Click or tap the Change Email button. The Verify Email Change popup appears.
- In the popup, ensure that the email address of the destination account is correct, and click or tap Yes. Groups.io displays a page that says:
“You have specified an email address, [destination address], that already has an account at Groups.io. If you wish to merge this account, [address to be deactivated], into that account, click the Merge Accounts button. An email will be sent to [destination address] with a link that, when clicked, will cause the accounts to be merged and this account to be deleted.”
- Click or tap the Merge button under that text. Groups.io displays a notification that an email has been sent to the destination address you entered.
- In the email application for your destination email address, open the email from Groups.io (the subject is “Confirm merging accounts”). Click the link in that email for merging the accounts. The link opens the Groups.io Log In page.
- Log in to Groups.io under your destination email address. Groups.io displays the Merge Accounts page, which says:
“Do you wish to merge the account associated with the email address [address to be deactivated] with your account? This will cause all subscriptions associated with [address to be deactivated] to be moved to your account and the [address to be deactivated] account will be deleted.”
- Click or tap the Merge button under that text. Groups.io completes the merge process and displays your Feed home page with a green banner at the top that says “Your accounts have been merged.”
You can download (export) copies of your contributions to any groups that you belong to (including your own messages), photos and files that you uploaded to Premium or Enterprise group websites, and other group content.
To export your Groups.io account data:
- Display your account settings page and select Login (if necessary).
- Scroll to the bottom of the Login page and click or tap the Export My Account button.
- On the Export Account Data page, select the checkboxes for the groups (and subgroups, if applicable) that you want to export data from.
- Click or tap the Generate Export button. Groups.io displays a green banner at the top of the page stating that your request has been submitted and that you can expect an email with a link to download a zip file (a compressed archive file) within 10 minutes.
- When you receive the email (the sender is Groups.io User Export Service, and the subject is “Export of [your email address]”), click or tap the Download User Export link, and open or save the zip file.
Note: The download link in the email is valid for 24 hours.
Premium and Enterprise groups can request donations from their group members, and all groups can enable a sponsorship feature. If you have made donations to or sponsored a group, you can review your donation or sponsorship history in your Groups.io account:
- Display your account settings page.
- Desktop browser: In the left menu, select Billing.
Mobile browser: Tap the More icon at the bottom of the page, then tap Billing on the More menu.
Restriction: In the Groups.io mobile app, the Billing entry is not available due to rules imposed by Google Play and the Apple App Store. Therefore, on a mobile device, you must use a browser to see the Billing page. - On the Billing page, review the Donation History panel and the Sponsorship History panel.
Your account’s Billing page also allows you to specify a credit card to keep on file with Groups.io. If you already used a credit card to make a donation or payment, that card’s information is shown here.
Note: If you are the designated payer for any paid groups, your Billing page shows your Groups.io payment history on the Group Payment History panel.
Overview of bouncing
When group messages cannot be delivered by email to a group member for some reason, the nondelivery events are called bounces. Those events put that member’s Groups.io account into a bouncing state that affects all the groups the member belongs to with that account’s email address.
Groups.io tries to notify a bouncing member by sending them an email message that has the subject line “Your Groups.io Account is Bouncing.” Also, when a bouncing member logs in to the Groups.io website, a red banner at the top of the page informs them that their account is bouncing.
Note: When a Groups.io account is bouncing, the member can still log in to group websites and read and post messages there. Bouncing affects only email delivery; it does not affect the member’s ability to use group websites.
Checking recent email bounces
If you realize that you have not received any group email messages for a while, but you have not received an email notification that your account is bouncing, you can check your account to see whether group email messages are bouncing:
- Display your account settings page.
- Desktop browser: In the left menu, select Bounces.
Mobile device: Tap the More icon at the bottom of the page, then tap Bounces on the More menu. - Review the Bounces page to see whether any messages are listed there and, if so, what the associated error messages are.
Tip: You can also check your email delivery history in individual groups you subscribe to. See Checking your email delivery history for a group.
What to do if your account is bouncing
When your Groups.io account is bouncing, you can try to “unbounce” your account using any of these methods:
- If you received a “Your Groups.io Account is Bouncing” email notification, click or tap the link in the email to unbounce your account.
- Make sure you are not logged in to Groups.io, and go to the Groups.io Log In page. Click or tap the Email me a link to log in button, then click or tap the login link in the email you receive.
- Go to the Groups.io website (and log in if necessary). You will be directed to a web page with a red banner at the top stating that your account is bouncing. The page shows the most recent bounce messages and gives you the option to either change your email address or send an email (also known as a bounce probe) to the bouncing address with a link to unbounce it.
! Important: Group owners and moderators cannot do anything to unbounce their group members’ accounts. When your account is bouncing, you must address the underlying problem yourself, which might involve contacting your email service provider for assistance or investigation.
What to do if members in your group have bouncing accounts
From time to time, group owners or moderators might want to review their group’s member list to check whether any members are being reported as bouncing.
! Important: Other than try to contact members and make them aware of their bouncing status, group owners and moderators cannot do anything to “unbounce” members’ accounts. Members must address the underlying problem themselves.
To check a group you own or moderate for bouncing members:
- Display the member list.
- In the list, review the Email column. Next to their email addresses, bouncing members have either a red B badge (“Bounced”—the system received no response to any bounce probes for 15 days) or a blue B badge (“Bouncing”—the system is sending bounce probes every 3 days).
Tip: To see a list of only the members who are bouncing, click or tap the Filter button above the list, select the Bouncing checkbox in the filter list, then click or tap Apply at the bottom of the filter list. The page is refreshed and displays a list of only the bouncing members. - Review the email delivery history of each bouncing member to try and determine the reason why the account is bouncing:
- On the Members page, click or tap in the row (anywhere except the checkbox) of a bouncing member. The Membership page for that member appears.
- Click or tap the Membership button at the top of the page, then select Email Delivery History from the dropdown list.
- On the resulting page, review the Bounces panel. It lists all recent bounces and the reasons for them.
Note: This panel displays activity from only your group. Because the account’s bouncing status could have resulted from failed deliveries of messages in another group the member belongs to, you might have to direct the member to look up their own bouncing activity to see what is going on. An individual member can find that information on the Bounces page for their account. See What to do if your account is bouncing.
Tip: In the Bounces panel on a member’s email delivery history page:
- 400-level errors usually indicate a temporary condition, and the affected message could subsequently get delivered.
- 500-level errors are considered permanent.
These resources on SMTP error codes provide information that you might find helpful:
Related help topics
- Display your account settings page.
- Desktop browser: In the left menu, select Sessions.
Mobile device: Tap the More icon at the bottom of the page, then tap Sessions on the More menu.
The resulting page lists your active Groups.io sessions and the devices on which the sessions are active. You can click or tap the Force Logout button to log out of a session you no longer use.
Note: With the Firefox browser, the Groups.io system cannot determine whether the Windows version is 10 or 11, so the Sessions page shows “Windows 10/11” for sessions that are running in Firefox.
If the group’s owner has set up integrations with GitHub or Trello and you are a member of either of those services, you can view your authenticated logins to those services:
- Display your account settings page.
- Desktop browser: In the left menu, select Other Services.
Mobile device: Tap the More icon at the bottom of the page, then tap Other Services on the More menu.
The resulting page lists the services for which you have authenticated your logins. You can click or tap the Log Out button to log out of a service.
Restriction: This feature is available only in Premium groups, Enterprise groups, and legacy Free groups.
If you see a field or column labeled GitHub Identity (or something similar) in your profile for a specific group or in a database table in a specific group, you can link your GitHub profile to that group:
- In the GitHub Identity field, click or tap the Connect GitHub Account button. A Sign in to GitHub popup window appears.
- Complete the Sign in to GitHub popup window and (if necessary) the device verification.
When you are signed in to GitHub and the authorization is complete, the popup window closes. You will see your GitHub avatar and username, with a link to your GitHub profile, on your group profile page or in the database row.
Note:
- The GitHub Identity field might be a required field, depending on how it was set up by the group’s owner.
- You can disconnect your GitHub account by editing the table row or group profile that contains the GitHub Identity field and clicking or tapping Remove GitHub Profile.
- Only one GitHub account can be connected per field.
- The connection persists until you explicitly remove it.
- Only public information in your GitHub profile is accessed by Groups.io. No actions are performed on your GitHub account.
- GitHub connection in Groups.io is only for identity verification, not for repository access.
- Your GitHub username might be visible to other group members, depending on permissions specified in the database table or your group profile.
Here are some issues that might occur when you try to link to your GitHub account, and how to resolve them:
- Popup blocked: Allow popups from Groups.io.
- Authorization declined: Accept it to complete the connection.
- Account already connected: Each GitHub account can be connected only once per field.
- Connection lost: The OAuth token might have expired. Try reconnecting.
Related help topics
Overview
API keys allow you to authenticate with the Groups.io application programming interface (API) without using your password. This feature allows users to generate, manage, and use API keys as an alternative to cookie-based authentication. Each key can be individually revoked if it is compromised.
Creating an API key
- Display your account settings page.
- Desktop browser: In the left menu, select API Keys.
Mobile device: Tap the More icon at the bottom of the page, then tap API Keys on the More menu.
Tip: The direct link to the API Keys page is https://groups.io/settings/apikeys. - On the resulting page:
- (Required) In the Key Name field, enter a descriptive name for the key (for example, CI/CD Pipeline or Mobile App).
- (Optional but recommended) In the Description field, document the purpose of the key.
- Click or tap Create API Key.
The page refreshes and displays the full 64-character key in a green banner at the top of the page. The key name and description (if you provided one) are displayed in a table titled Your API Keys at the bottom of the page. - ! Important: Immediately copy and securely store the full key that is shown in the green banner. You will not be able to display it again.
Viewing API keys
- Display your account settings page.
- Desktop browser: In the left menu, select API Keys.
Mobile device: Tap the More icon at the bottom of the page, then tap API Keys on the More menu.
Tip: The direct link to the API Keys page is https://groups.io/settings/apikeys.
Note: The full key is never shown again after creation.
Revoking or deleting an API key
You can revoke a key to disable it without deleting it, which preserves an audit trail. Deleting a key permanently removes it from the system.
To revoke or delete an API key:
- Display your account settings page.
- Desktop browser: In the left menu, select API Keys.
Mobile device: Tap the More icon at the bottom of the page, then tap API Keys on the More menu.
Tip: The direct link to the API Keys page is https://groups.io/settings/apikeys. - In the key’s row in the Your API Keys table, click or tap the Revoke or Delete button (as applicable).
- When the confirmation popup appears, click or tap OK.
Best practices for end users
- Key generation
- Use descriptive names. Examples: CI/CD Pipeline, Mobile App
- Add descriptions to remember the keys’ purpose.
- Store keys immediately because they cannot be retrieved later.
- Key storage
- Never share API keys via email or chat.
- Use environment variables in applications.
- Consider using secrets management tools.
- Key rotation
- Generate new keys before revoking old ones.
- Update applications with new keys.
- Monitor last used dates to identify unused keys.
- Security
- Treat API keys like passwords.
- Revoke compromised keys immediately.
- Delete unused keys regularly
Best practices for developers
- Using API keys
```bash

	 curl -H "Authorization: Bearer YOUR_API_KEY" https://groups.io/api/v1/getsubs

``` - Error handling
- Check for 401 Unauthorized responses.
- Implement key rotation in applications.
- Log API errors for debugging. Never log the key itself.
- Migration from cookie authentication
- API keys provide stateless authentication.
- Better for automated systems and CI/CD.
- No session management required.
Technical architecture
- Database schema
API keys are stored in the 'apikeys' table with the following structure:
- id: Unique identifier for the API key
- userid: ID of the user who owns the key
- name: User-defined name for the key (required)
- description: Optional description of the key's purpose
- keyprefix: First 8 characters of the key for efficient database lookups
- keyhash: BCrypt hash of the full key for secure storage
- status: Active (0) or Revoked (1)
- lastused: Timestamp of last API call using this key
- expiresat: Optional expiration date (if not set, key never expires)
- created/updated/version: Standard audit fields
- Key generation and storage
- Keys are 64 characters long (32 random bytes converted to hexadecimal).
- The full key is shown only once during creation.
- Keys are stored using BCrypt hashing (same security as passwords).
- First 8 characters are stored as plaintext for efficient lookup.
- Keys cannot be recovered if lost. Users must generate new ones.
- Authentication flow
- Client includes API key in the 'Authorization' header as a Bearer token:
```

		   Authorization: Bearer [64-character-api-key]

``` - Server extracts the key prefix (first 8 chars) for database lookup.
- Server retrieves potential matching keys from database.
- Server verifies the full key against the BCrypt hash.
- If valid and active, the associated user is authenticated.
- Last used timestamp is updated asynchronously.
- Client includes API key in the 'Authorization' header as a Bearer token:
Security considerations
- Key security
- Keys have same authentication power as passwords.
- Keys should be stored securely (environment variables, secrets management).
- Never commit keys to version control.
- Rotate keys periodically.
- Status management
- Active keys can authenticate API requests.
- Revoked keys are disabled but retained for audit purposes.
- Expired keys (if expiration is set) automatically become inactive.
- Usage tracking
Last used timestamp:
- Helps identify inactive keys.
- Can be used to detect unauthorized usage.
- Assists in key rotation decisions.
API implementation
- Authentication priority
The API server checks authentication in this order:
- API key in Authorization header (if present)
- Cookie-based authentication (existing method)
- Supported endpoints
All existing API endpoints that require authentication support API key authentication. No changes to endpoint behavior; only the authentication method differs.
- Error handling
- Invalid/missing API key returns standard authentication error.
- Revoked keys return authentication error.
- Expired keys return authentication error.
- No distinction in error messages (security through obscurity).
Limitations and considerations
- No scope limitations: API keys have full access to all of the user's permissions (same as logging in).
- No IP restrictions: Keys can be used from any IP address.
- No rate limiting: Per-key rate limiting is not implemented (uses existing user rate limits).
- Single user association: Each key belongs to exactly one user.
- No automatic expiration: Keys do not expire unless they are explicitly set to do so.
Related help topics
To log out of your Groups.io account:
- On any group page, click or tap your display name or email address at the upper right in the blue page header.
- Select Log Out from the dropdown menu.
Note: On a mobile device, you might need to use landscape orientation to see your display name or email address. In portrait orientation, you can tap your profile picture (or the generic profile icon if you have not set a picture) on the right side of the blue page header and then select then select Log Out from the dropdown menu.
If you want to delete your Groups.io account:
- Display your account settings page.
- Scroll to the bottom of the page.
- Click or tap the Delete My Account button at the far right.
- On the Delete Your Account page, enter I understand to verify that you want to delete your account, then click or tap Delete My Account.
! Important: Your account cannot be deleted if you are the only owner of at least one group. In that situation, you should either transfer ownership of the group to someone else or delete the group before you delete your account.
Controlling how much email you receive from a group
Enabling or disabling web/app notifications
Advanced subscription preferences
Moderator notification settings
Options for controlling email delivery
If a group you belong to is particularly active and you want to reduce the number of email messages you receive from it, you have these options:
- Receive messages in all topics except for topics that you explicitly mute, including topics with hashtags that you mute. (Muting means that you are not sent any further messages associated with that topic or hashtag.)
- Receive messages only in topics that you explicitly follow, including topics with hashtags that you follow. (Following means that you are sent messages associated with that topic or hashtag.)
- Receive a digest or daily summary instead of receiving individual messages as they are sent.
- Set your email delivery method for the group to No Email. You can still log in to the group’s website and read messages there at your convenience, but you will not receive group messages by email.
Note: Muting and following affect email delivery only. Any topics and hashtags that you mute or are not following by email are still visible to you in the message archive on the group's website.
Tip: If you have set your email delivery method to No Email but you still would like to receive notifications about new messages or for topics that have specific hashtags, you can enable web/app notifications for new messages (see Member notification settings) or for those particular hashtags (see Hashtag uses and notes). Those notifications will be sent to your web browser or mobile device but will not generate emails.
Setting your email delivery method
- Desktop browser: On any page at the group’s website, select Subscription > Settings from the left menu.
Mobile device: On any page in the group, tap the More icon at the bottom, then tap Subscription > Settings on the More menu. - On the Subscription page, in the Email Delivery panel, select the option you want to use for the group. See Email delivery settings.
- Scroll to the bottom of the page and click or tap the Save button.
Tip: You can set the email delivery method for several groups at once from the Your Groups home page.
Muting topics or hashtags
To be able to apply muting, you must select All Messages in the Message Selection area of your Advanced subscription preferences. However, be aware that group owners or moderators might set some hashtags so they cannot be muted.
If you receive individual email messages from the group, the footer in each message contains a Mute This Topic link as well as links to mute any hashtags associated with that topic. If you receive message digests, a Mute Topic link is at the end of each message in the digest. Clicking or tapping these links takes you to the group’s website, where you can confirm or cancel the action.
When you are viewing messages on the group’s website, in either Topics view or Messages view, you can click or tap the Mute button that is displayed at the top of each topic page or individual message’s page to mute that topic.
For hashtags: To mute specific hashtags (so you stop receiving messages in topics that are tagged with those hashtags), you can use any of these methods:
- In a group email message, click or tap Mute for any hashtag listed in the message footer.
- On the Hashtags page on the group’s website, click or tap the Mute/Notify button (or link, if you are viewing the page in List View) for the hashtag. On the resulting page, in the Email panel, select the Mute Topics checkbox, and select a length of time from the Mute Duration list. Then click or tap the Update button at the bottom of the page.
- On an individual hashtag’s page, click or tap the Mute button under the hashtag’s name near the top of the page. On the resulting page, select the Mute Topics checkbox, and select a length of time from the Mute Duration list. Then click or tap the Update button at the bottom of the page.
- When you are viewing a topic on the group’s website, hashtags are displayed next to the topic’s subject line. In that view, you can click or tap the down arrow in a hashtag to display a dropdown menu, then select Mute from that menu. On the resulting page, select the Mute Topics checkbox, and select a length of time from the Mute Duration list. Then click or tap the Update button at the bottom of the page.
Tip: Consider setting a specific duration limit (as opposed to leaving the hashtag muted forever) because the same hashtag could be used in future topics that you might be interested in.
Note: If a moderator has set a hashtag to Special (meaning messages with that hashtag are sent as special notices), you cannot mute that hashtag because special notices cannot be muted.
Unmuting topics or hashtags
To unmute topics or hashtags that you have muted, use any of the methods mentioned in Muting topics and hashtags above. The button or link will be labeled “Unmute” instead of “Mute.”
Following topics or hashtags
To be able to follow or stop following (unfollow) topics or hashtags, you must select Following Only in the Message Selection area of your Advanced subscription preferences. With this preference set, you receive messages only in topics that you choose to follow and messages in topics with hashtags that you choose to follow.
To receive the first message in each new topic that is posted to the group—so you can then decide whether to follow that topic—select the First Message Also checkbox when you set the Following Only preference for your subscription.
If you receive individual email messages from the group, and you selected First Message Also in your subscription preferences, the footer in those messages contains a Follow This Topic link and links to follow any hashtags associated with that topic. If you did not select First Message Also, you can select which topics to follow using the Groups.io website.
Email messages other than the first one in a topic include an Unfollow This Topic link and links to unfollow any hashtags associated with that topic. If you receive message digests, the follow or unfollow links are at the end of each message in the digest. Clicking or tapping these links takes you to the group’s website, where you can confirm or cancel the action.
Note: If the owner has set the group’s Reply To setting to “Topic Followers Only,” you will, by default, be following any topics you create in that group. Therefore, regardless of whether you set the Following Only preference in your email subscription for that group, you will see an Unfollow This Topic link in the email footers of topics that you create.
When you are viewing messages on the group’s website, in either Topics view or Messages view, you can click or tap the Follow This Topic button that is displayed at the top of each topic page or individual message’s page to follow that topic.
For hashtags: When you have selected Following Only in your email subscription for the group, you will see a Follow/Notify button (or link), instead of a Mute/Notify button (or link), on the group’s Hashtags page and on individual hashtag pages. To follow specific hashtags—so you receive messages in topics that are tagged with those hashtags—you can use any of these methods:
- In a group email message, click or tap Follow for any hashtag listed in the message footer.
- On the Hashtags page on the group’s website, click or tap the Follow/Notify button (or link, if you are viewing the page in List View) in the hashtag. On the resulting page, in the Email panel, select the Follow Topics checkbox, and select a length of time from the Follow Duration list. Then click or tap the Update button at the bottom of the page.
- On an individual hashtag’s page, click or tap the Follow button near the top. On the resulting page, select the Follow Topics checkbox, select a length of time from the Follow Duration list, and then click or tap the Update button.
- When you are viewing a topic on the group’s website, hashtags are displayed next to the topic’s subject line. In that view, you can click or tap the down arrow in a hashtag to display a dropdown menu, then select Follow from that menu. On the resulting page, select the Follow Topics checkbox, and select a length of time from the Follow Duration list. Then click or tap the Update button at the bottom of the page.
Tip: Consider setting a specific duration limit (as opposed to following the hashtag forever) because the same hashtag could be used in future topics that you might not be interested in.
Unfollowing topics or hashtags
To unfollow topics or hashtags that you are following, use any of the methods mentioned in Following topics or hashtags above. The button or link will be labeled “Unfollow” instead of “Follow.”
Managing muted and followed topics
The Topics home page on the Groups.io website provides a place where you can manage the topics that you have muted or are following in all of your group subscriptions:
- At the top of any group page, click or tap the Groups.io logo on the far left in the blue header. This action takes you to the most recent Groups.io home page that you viewed.
- Desktop browser: On the resulting page, select Topics from the left menu to display a submenu. In the submenu, select Muted or Followed, depending on which topics you want to manage.
Mobile device: On the resulting page, tap the More icon at the bottom. On the More menu, select Muted Topics or Followed Topics, depending on which topics you want to manage. - On the resulting page, find the topic you want, and click or tap its link to open it.
- At the top of the topic’s page, click or tap the applicable button to take the associated action:
- Mute This Topic
Stop email delivery of messages in that topic.
- Unmute This Topic
Resume email delivery of messages in that topic.
- Follow This Topic
Start email delivery of messages in that topic.
- Unfollow This Topic
Stop email delivery of messages in that topic.
- Mute This Topic
Managing muted and followed hashtags
The Hashtags home page on the Groups.io website provides a place where you can manage the hashtags that you have muted or are following in all of your group subscriptions:
- At the top of any group web page, click or tap the Groups.io logo on the far left in the blue header. This action takes you to the most recent Groups.io home page that you viewed.
- Desktop browser: Select Hashtags from the left menu to display a submenu. In the submenu, select Muted or Followed, depending on which hashtags you want to manage.
Mobile device: Tap the More icon at the bottom of the page. On the More menu, select Muted Tags or Followed Tags, depending on which hashtags you want to manage. - On the resulting page, you can:
- Remove a hashtag from the list by selecting the checkbox next to it and then clicking or tapping the Remove button (for muted hashtags) or Delete button (for followed hashtags).
- Add a hashtag to the list by clicking or tapping the Mute A New Hashtag link (for muted hashtags) or Follow A New Hashtag link (for followed hashtags) at the upper right of the page.
About web/app notifications
In your Groups.io account, you can enable web/app notifications about group activity on your mobile device and desktop web browser. A web/app notification is an automated alert message about displayed by a website or mobile app outside of the web browser or app user interface (even when the website or app is not open). The location and style of these notifications depend on the device’s operating system and the browser.
In Groups.io, members who are not group owners or moderators can opt to receive web/app notifications on their mobile or desktop device when:
- New messages are posted to a group
- New messages are posted to a chat they are participating in
- Messages that contain specific hashtags are posted to a group
Group owners and moderators have additional options for controlling the web/app notifications (and email notifications) they receive about group activity. See Moderator notifications about group activity.
Enabling web/app notifications
Before you can receive any web/app notifications, you must enable them in your Groups.io account. Follow these steps on each device and in each browser where you want to see the notifications:
- ! Important: Ensure that the browser or app allows notifications from Groups.io. The instructions depend on your specific browser and device. See your browser’s or device’s settings and help information.
Note: If private browsing mode is enabled in your browser, push notifications might not work. In that situation, you must disable private browsing to receive web/app notifications. - Display your account settings.
- Desktop browser: In the left menu, select Notifications.
Mobile device: Tap the Notifications icon at the bottom of the page. - On the Notifications page, click or tap the Enable Notifications button (the full label varies depending on whether you are using a mobile device). If a popup appears asking you to confirm that you want to allow Groups.io to show notifications, click or tap the option that allows notifications. The Notifications page then lists the device (operating system) and browser for which you enabled notifications.
- If desired, click or tap the Send A Test Notification button to check that Groups.io notifications appear in the browser or on the mobile device.
The steps above enable web/app notifications from all your Groups.io groups. To control the web/app notifications that you see from an individual group, see Member notification settings and also Hashtag uses and notes (for notifications about messages tagged with specific hashtags).
Disabling web/app notifications
To disable web/app notifications from all your groups:
- Display your account settings.
- Desktop browser: In the left menu, select Notifications.
Mobile device: Tap the Notifications icon at the bottom of the page. - On the Notifications page, click or tap the Disable Notifications In button (the full label varies depending on whether you are using a mobile device). Or, if you want to disable notifications on all your devices, click or tap the Disable Notifications on All Devices button.
- When the Verify Disable Notifications popup appears, click or tap Yes.
For each group you belong to, you can set individual email subscription and notification preferences on your Subscription page for that group.
To display the Subscription page:
- Log in to your Groups.io account if you are not already logged in. See Logging in to your account.
- Go to the group for which you want to edit your settings.
- Desktop browser: Click Subscription > Settings in the left menu.
Mobile device: Tap the More icon at the bottom of a page then tap Subscription > Settings on the More menu.
On the Subscription page, you can set or change these elements:
- Email Delivery settings
- Signature
- Member notification settings
- Moderator notification settings (group owners and moderators only)
- Owner email setting (group owners and moderators only)
! Important: When you finish making your selections, scroll to the bottom of the page and click or tap the Save button.
Location in desktop browser: Left menu > Subscription > Settings > Email Delivery panel on Subscription page
Location on mobile device: Bottom of page > More icon > Subscription > Settings > Email Delivery panel on Subscription page
! Important: When you finish making your selections, scroll to the bottom of the page and click or tap the Save button.
The group owner sets a default email delivery option for their group. If you want to use a different delivery option, go to the Email Delivery panel on your Subscription page and select the option that specifies how you want to receive the group’s messages by email:
- Individual Messages
You receive each message individually as soon as it is posted to the group.
- Full Featured Digest
You receive a fully formatted (HTML) digest containing the day’s messages. For more information, see Message digests and summaries.
- Plain Digest
You receive a plain text digest containing the day’s messages. For more information, see Message digests and summaries.
- Daily Summary
You receive a once-daily list of topics that were posted that day. Unlike the digests, the summary does not include the text of any of the messages. It contains only a list of topics.For more information, see Message digests and summaries.
- Special Notices Only
You receive only the messages that moderators have designated as special notices.
- No Email
With this setting, you do not receive any group messages by email. You can still access messages and other group features on the group’s website. You might still receive individual notifications from the group (for example, a message sent directly to you by a group moderator) and system messages from Groups.io.
Tip: If you would like to be notified when new messages are posted to the group, you can opt to receive web/app notifications for new messages. See Member notification settings.
Note: If the No Email setting is not available, the owner decided to disable it for the group.
Note: Some options might not be available, depending on how the group is set up.
Tips:
- You can also set your email delivery option by email. See Standard group email addresses.
- If you belong to multiple groups and you want to use the same email delivery setting for several or all of them, you can change the setting for all the groups at once from Your Groups home page.
Location in desktop browser: Left menu > Subscription > Settings > Signature panel on Subscription page
Location on mobile device: Bottom of page > More icon > Subscription > Settings > Signature panel on Subscription page
! Important: When you finish making your selections, scroll to the bottom of the page and click or tap the Save button.
In the Signature panel on the Subscription page, you can enter and format a signature to be included with your posts to this group. To specify where you want your signature included—web postings or email postings—select the applicable checkbox. You can select both if desired.
Location in desktop browser: Left menu > Subscription > Settings > Advanced Preferences panel on Subscription page
Location on mobile device: Bottom of page > More icon > Subscription > Settings > Advanced Preferences panel on Subscription page
! Important: When you finish making your selections, scroll to the bottom of the page and click or tap the Save button.
Message Selection
In the Message Selection section of the Advanced Preferences panel, select the preference that specifies which messages you want to receive by email:
- All Messages
You receive every message (individually or in digests, depending on your Email Delivery setting) posted to the group except those that are in topics you have specifically muted or that are tagged with one or more hashtags you have specifically muted. (This setting is the default.)
- Following Only
You receive only the messages (individually or in digests, depending on your Email Delivery setting) posted to the group that are in topics you are specifically following or that are tagged with one or more hashtags you are specifically following.
- First Message Also
You receive the first message of each new topic, regardless of the fact that you have not yet followed that topic. This setting helps you to manage the amount of email you receive from a very active group. It allows you to know that a given topic has been posted so you can then decide whether to follow any additional messages in that topic.
Note: You cannot select this checkbox unless you select Following Only.
- Auto Follow Replies
You receive all replies to topics that you start or reply to. This setting marks any topic that you start or reply to as one that you follow.
Note: This checkbox is selected automatically when you select Following Only.
Note: The Message Selection preferences do not apply if you select Special Notices Only or No Email in the Email Delivery panel. Be aware that:
- If your Email Delivery preference is set to either Special Notices Only or No Email and you change the Message Selection preference from All Messages to Following Only, your Email Delivery preference will be changed automatically to Individual Messages.
- If your Message Selection preference is Following Only and you change your Email Delivery preference to either Special Notices or No Email, your Message Selection preference will be changed automatically to All Messages.
Max Attachment Size
If you want to specify a default maximum size for attachments that you receive in group email messages, expand the Advanced Preferences panel and select an option from the Max Attachment Size list. The default maximum attachment size is 15MB.
This setting is useful if you have a metered or limited Internet connection or you have limited storage space for attachments. When an attachment exceeds the maximum size you selected, or the total size of all attachments to a message exceeds the maximum size, you will receive links to the attachments (instead of receiving the actual files) so you can open the attachments from the group's website.
Note: Within the first 5 days of receiving the message with the attachment links, clicking the links does not require you to log in to Groups.io. After that period, if you click on one of the links and you are not logged in to Groups.io, you are redirected to the login page first. After you log in, you are automatically redirected back to the linked attachment.
Location in desktop browser: Left menu > Subscription > Settings > Member Notifications panel on Subscription page
Location on mobile device: Bottom of page > More icon > Subscription > Settings > Member Notifications panel on Subscription page
! Important: When you finish making your selections, scroll to the bottom of the page and click or tap the Save button.
In the Member Notifications panel on your Subscription page, use the dropdown lists to turn on or turn off web/app notifications about new group messages or new chat messages.
Note: To receive web/app notifications, you must enable them in your Groups.io account. For more information, see Enabling or disabling web/app notifications.
Location in desktop browser: Left menu > Subscription > Settings > Moderator Notifications panel on Subscription page
Location on mobile device: Bottom of page > More icon > Subscription > Settings > Moderator Notifications panel on Subscription page
Restriction: The Moderator Notifications panel appears only if you are an owner or moderator of the group.
! Important: When you finish making your selections, scroll to the bottom of the page and click or tap the Save button.
For each activity type listed on the Moderator Notifications panel, use the associated dropdown list to select your preferred notification method for that activity:
- Email and web/app
When the activity occurs, you receive both an email notification and a web/app notification (if you have enabled web/app notifications in your Groups.io account). This method is the default.
- Email only
When the activity occurs, you receive only an email notification.
- Web/App only
When the activity occurs, you receive only a web/app notification.
- None
You receive no notification of any kind when the activity occurs.
Note:
- To receive web/app notifications, you must enable them in your Groups.io account. For more information, see Enabling or disabling web/app notifications.
- Email notifications sent to moderators as a result of their Moderator Notifications settings do not include system hashtags.
- With email notifications, a delay of 4 to 8 minutes occurs between when the action is taken and when the corresponding email notification is delivered. This delay allows the system to combine multiple actions of the same type that occur within a short period of time into a single notification, which prevents a barrage of individual email notifications.
- Web/app notifications are always sent individually; they are not delayed or combined.
- If you are the one who performs an activity that you have chosen to be notified about, you will not receive a web/app notification or email notification for it.
Exceptions:- If an unauthorized (spam) unsubscription occurs, you will receive a web/app notification if you were unsubscribed as a result.
- You will receive a web/app notification about reaching the group’s storage limit even if your upload or post was the one that caused the limit to be reached.
Location in desktop browser: Left menu > Subscription > Settings > Owner Email panel on Subscription page
Location on mobile device: Bottom of page > More icon > Subscription > Settings > Owner Email panel on Subscription page
Restriction: The Owner Email panel appears only if you are an owner or moderator of the group.
! Important: When you finish making your selections, scroll to the bottom of the page and click or tap the Save button.
The Owner Email panel on your Subscription page contains options for receiving emails that are sent to the group’s owner email address (groupname+owner@groups.io). Select your desired option:
- All Emails
You will receive all email messages that are sent to the owner email address, including from nonmembers and possible spammers.
Note: If your group uses a Pending Subscription notice, at least one owner or moderator should select the All Emails option. - Members Only
You will receive only email messages that are sent to the owner email address by group members. This setting is the default.
- None
You will not receive any email messages sent to the owner email address.
Be aware that all moderators and owners who select the All Emails option or the Members Only option will receive email messages that are sent to the group owner email address. If your group has several moderators, not all of them might need (or want) to receive owner emails. In that case, some of them could select the None option.
Related help topic
After you log in to Groups.io, the home page becomes one of these pages that consolidate information across all the groups you are subscribed to:
- Your Feed home page (this page is displayed if it is the first time you logged in to Groups.io)
- Your Groups home page
- Topics home page
- Hashtags home page
- Your Calendar home page
- Your Chats home page
- Your Activity home page
- Pending home page (available only if you are an owner or moderator of one or more groups)
The home page you see is the one you were viewing the last time you were logged in.
Tip: You can click or tap the Groups.io logo at the far left in the blue header bar to go to the home page you viewed most recently. To display a different home page, select it from the left menu in a desktop browser or from the More menu on a mobile device.
Direct link: https://groups.io/feed
This page lists recent activity in your groups. The group that had the most recent activity is listed first, followed by the group with the next most recent activity, and so on.
You can click or tap a group's icon to go to that group. You can also click or tap other links in the list to go to those elements (topics, calendar events, and so on).
Direct link: https://groups.io/groups
This page displays a list of the groups (and subgroups, if applicable) you belong to and any badges associated with your group membership status, your email delivery preference, and the group’s status (locked or unlocked).
Columns on the page show the email delivery method you set in each group, the number of members in each group, and the time or date of the latest message in each group. You can click or tap a column heading to sort the list by that column. (On a mobile device, use landscape orientation to see the columns.)
Note: Group owners and moderators also see an Approvals Needed column.
Blue text indicates a link you can click or tap to go to (based on the column) a group’s Topics page, your Subscription page for that group, or the member list for that group (if you are an owner or moderator, or if the group’s owner has made the member list available to all group members).
Tip: You can use the Actions button at the bottom of the Your Groups page to change your email delivery option for a group (or more than one group) directly from this page, instead of going to your Subscription page for each group:
Note: On a mobile device, use landscape orientation to see the checkboxes and the Actions button.
- Select the checkbox (or checkboxes) next to the desired group (or groups).
- Scroll down and click or tap the Actions button.
- From the dropdown menu, select the option you want to apply to the group (or groups):
- Unsubscribe
- No Email
- Individual Messages
- Plain Digest
- Full Digest
- Summary
- Special Notices Only
Related help topics
Desktop browser: On a Groups.io home page (not an individual group’s home page), click Topics and select the option for the topics you want to see.
Mobile device: On a Groups.io home page (not an individual group’s home page), tap the More icon at the bottom, then, on the More menu, select the option for the topics you want to see.
The options are:
- All (desktop) or All Topics (mobile): Displays the All Topics page (direct link: https://groups.io/topics), which lists the topics in all the groups you belong to. By default, the topics that have the most recent replies are at the top of the list.
- Muted (desktop)or Muted Topics (mobile): Displays the Muted Topics page (direct link: https://groups.io/topics?m=1), which lists any topics that you have chosen to mute in any of the groups you belong to.
- Followed (desktop) or Followed Topics (mobile): Displays the Followed Topics page (direct link: https://groups.io/topics?f=1), which lists all the topics that you have chosen to follow in any of the groups you belong to.
Tip: By default, Groups.io displays 20 items per page. You can increase the number of items displayed per page in the display preferences for your Groups.io account. See Setting the number of items to show on group web pages.
Direct link: https://groups.io/calendar
This page displays a consolidated calendar that contains events from the calendars in all your groups (if the Calendar feature is available in the groups and enabled for group members to use). Buttons and other controls on this page allow you to:
- Show only the events for which you sent RSVPs.
- Display calendar events in Month, Week, Day, or List view. The default is Month view, but if you select another option, that view will be used in your future visits to this page.
- Add an event to any of your group calendars that members are allowed to add events to.
- Subscribe to your Groups.io calendar from another application that supports iCalendar format (such as Google Calendar, Microsoft Outlook, or Apple Calendar).
Note: The subscription (synchronization) is only one way, from Groups.io to the other calendar. - Select a different timezone for displaying calendar events.
Related help topic
Direct link: https://groups.io/chats
This page displays the chats you created or are participating in across all your groups (if the Chats feature is available in the groups and enabled for group members to use). You can click or tap a chat’s link to go directly to that chat.
Related help topic
Direct link: https://groups.io/activity
This page lists all the actions that you personally have taken in all of the groups you belong to. If you are a group owner or moderator, the page includes your owner or moderator actions.
You can filter your activity by using the Any Time button, the actions list, and the Search option.
Direct link: https://groups.io/pendingmsgs
This page lists all pending messages that are in any of the groups of which you are an owner or a moderator with at least the Approve Pending Messages privilege.
Note: This page is available only if you are an owner or moderator in one or more of your groups.
Related help topic
Every group hosted at Groups.io has its own website with its own individual content. A group’s content includes:
- A group-specific home page that contains the group’s description and other information about the group (including, if the group’s message archive is public [that is, visible to anyone], a link to the group’s RSS feed)
- Messages posted to the group
- Hashtags used in the group*
- In Premium and Enterprise groups and legacy Free groups (those created before August 24, 2020):
- Files uploaded to the group*
- Photos uploaded to the group*
- Polls posted to the group*
- Chats*
- Directory of group members*
- Group calendar*
- Databases*
- Wiki*
*Group owners control whether this feature is enabled in their groups and, if it is, the type of access that is available to group members.
Once you are logged in to Groups.io, you can use any of these methods to visit the websites of the groups you belong to:
- In the blue header bar at the top of a Groups.io page, click or tap Your Groups and then select the desired group from the dropdown menu. Tip: On a mobile device, use landscape orientation to see the Your Groups menu.
- Desktop browser: When you are on one of your Groups.io home pages, select Your Groups in the left menu. When the Your Groups home page is displayed, click the link of the desired group in the Group column.
- Mobile device: When you are on one of your Groups.io home pages, tap the Groups icon or Feed icon at the bottom of the page to display a list of your groups, then tap the group you want to visit.
- Click or tap the Groups.io logo in the blue header bar to go to your most recent Groups.io home page, then select Your Groups in the left menu (in a desktop browser) or tap the Groups icon or Feed icon at the bottom of the page (on a mobile device). Then select or tap the group you want to visit.
Typically, the link to a group from the methods above takes you to the group’s Topics page. In desktop browsers, use the left navigation menu to select other features in the group. On a mobile device, use the icons at the bottom of the page or the More menu to select other group features.
Related help topic
Viewing topics and messages on group websites
Controlling how much email you receive from a group
Checking your email delivery history for a group
Using email to send or reply to group messages
Using the group's website or app to post new topics or reply to existing messages
Searching for messages in the archive
Editing the content of messages in the archive
Responding to a "You have been removed because of reported spam" message from Groups.io
Downloading a group's message archive
About topics and messages
In Groups.io, a topic is a collection of messages about a particular subject. The topic includes the initial message that was posted along with any replies to that message (including replies to those replies).
In the message archive on a group’s website, when you click or tap a topic’s link to open it, the topic is displayed with the initial message at the top of the page and replies expanded underneath it (unless you clicked or tapped the Date link to display messages in reverse date order).
Note: In the archive, certain icons might appear on topic subject lines. For a list of these icons and their descriptions, see Topic icons.
Topics view, Messages view, and Expanded view
When you visit a group’s website, the initial page that is displayed is the Topics page, also referred to as Topics view. By default, the topics are listed in order from newest to oldest, after any “sticky” topics that were pinned to the top of the page by a group owner or moderator. You can click or tap the Date link at the upper right to list the topics from oldest to newest. Click or tap a topic’s subject line to view the full topic as well as any replies to it.
To view a list of individual messages (Messages view) instead of topics, click or tap the Topics button at the top left of the page and select Messages. By default, the messages are listed in order from newest to oldest. You can click or tap the Date link at the upper right to list the messages from oldest to newest. Click or tap a message’s subject line to view the full message.
When you select Expanded from the Topics button or Messages button, messages are listed in order of their message numbers (shown at the far right next to the date), with the full text of each message displayed. Groups.io assigns message numbers according to the dates and times the messages are posted. By default, messages are displayed from newest (highest message number) to oldest (lowest message number). Click or tap the Date link at the upper right to list the messages oldest to newest.
Note: On a mobile device, you might need to rotate the device to landscape orientation to see the message numbers in Expanded view.
The default number of topics or messages listed per page is 20. You can change that number in the display preferences in your Groups.io account. See Setting the number of items to show on group web pages.
About the Show quoted text button
When you are viewing messages on a group’s website, you might see a Show quoted text button below some replies.
That button appears when a reply contains the text of a quoted message and that quoted text is located at the bottom of the message. In other words, the reply’s author entered the content of their reply above the message they quoted (either using their email application or when composing their reply on the group’s website). In those cases, Groups.io adds the Show quoted text button on the group’s website to conserve screen space.
When you click or tap Show quoted text, the quoted text is expanded under the reply, and the button label changes to Hide quoted text. You can click or tap Hide quoted text to collapse (hide) the quoted text.
If you do not see a Show quoted text button in a reply, then that reply does not include any quoted text at the bottom.
Note:
- Email applications have their own settings or preferences for whether messages are quoted in replies and how quoted text appears.
- Different email applications quote replies in different ways. The Groups.io system does its best to determine whether quoted content is a reply based on message headers or lines that contain certain text (such as “--Original Message--” or “On [date] [name or email] wrote:” and so on). Because of those email differences, quoted text on the group website might not generate a Show quoted text button.
- Quoted text at the bottom of replies is not included in message digests, to save space. If you receive digests, you will need to view those messages online if you want to see the quoted text.
Options for controlling email delivery
If a group you belong to is particularly active and you want to reduce the number of email messages you receive from it, you have these options:
- Receive messages in all topics except for topics that you explicitly mute, including topics with hashtags that you mute. (Muting means that you are not sent any further messages associated with that topic or hashtag.)
- Receive messages only in topics that you explicitly follow, including topics with hashtags that you follow. (Following means that you are sent messages associated with that topic or hashtag.)
- Receive a digest or daily summary instead of receiving individual messages as they are sent.
- Set your email delivery method for the group to No Email. You can still log in to the group’s website and read messages there at your convenience, but you will not receive group messages by email.
Note: Muting and following affect email delivery only. Any topics and hashtags that you mute or are not following by email are still visible to you in the message archive on the group's website.
Tip: If you have set your email delivery method to No Email but you still would like to receive notifications about new messages or for topics that have specific hashtags, you can enable web/app notifications for new messages (see Member notification settings) or for those particular hashtags (see Hashtag uses and notes). Those notifications will be sent to your web browser or mobile device but will not generate emails.
Setting your email delivery method
- Desktop browser: On any page at the group’s website, select Subscription > Settings from the left menu.
Mobile device: On any page in the group, tap the More icon at the bottom, then tap Subscription > Settings on the More menu. - On the Subscription page, in the Email Delivery panel, select the option you want to use for the group. See Email delivery settings.
- Scroll to the bottom of the page and click or tap the Save button.
Tip: You can set the email delivery method for several groups at once from the Your Groups home page.
Muting topics or hashtags
To be able to apply muting, you must select All Messages in the Message Selection area of your Advanced subscription preferences. However, be aware that group owners or moderators might set some hashtags so they cannot be muted.
If you receive individual email messages from the group, the footer in each message contains a Mute This Topic link as well as links to mute any hashtags associated with that topic. If you receive message digests, a Mute Topic link is at the end of each message in the digest. Clicking or tapping these links takes you to the group’s website, where you can confirm or cancel the action.
When you are viewing messages on the group’s website, in either Topics view or Messages view, you can click or tap the Mute button that is displayed at the top of each topic page or individual message’s page to mute that topic.
For hashtags: To mute specific hashtags (so you stop receiving messages in topics that are tagged with those hashtags), you can use any of these methods:
- In a group email message, click or tap Mute for any hashtag listed in the message footer.
- On the Hashtags page on the group’s website, click or tap the Mute/Notify button (or link, if you are viewing the page in List View) for the hashtag. On the resulting page, in the Email panel, select the Mute Topics checkbox, and select a length of time from the Mute Duration list. Then click or tap the Update button at the bottom of the page.
- On an individual hashtag’s page, click or tap the Mute button under the hashtag’s name near the top of the page. On the resulting page, select the Mute Topics checkbox, and select a length of time from the Mute Duration list. Then click or tap the Update button at the bottom of the page.
- When you are viewing a topic on the group’s website, hashtags are displayed next to the topic’s subject line. In that view, you can click or tap the down arrow in a hashtag to display a dropdown menu, then select Mute from that menu. On the resulting page, select the Mute Topics checkbox, and select a length of time from the Mute Duration list. Then click or tap the Update button at the bottom of the page.
Tip: Consider setting a specific duration limit (as opposed to leaving the hashtag muted forever) because the same hashtag could be used in future topics that you might be interested in.
Note: If a moderator has set a hashtag to Special (meaning messages with that hashtag are sent as special notices), you cannot mute that hashtag because special notices cannot be muted.
Unmuting topics or hashtags
To unmute topics or hashtags that you have muted, use any of the methods mentioned in Muting topics and hashtags above. The button or link will be labeled “Unmute” instead of “Mute.”
Following topics or hashtags
To be able to follow or stop following (unfollow) topics or hashtags, you must select Following Only in the Message Selection area of your Advanced subscription preferences. With this preference set, you receive messages only in topics that you choose to follow and messages in topics with hashtags that you choose to follow.
To receive the first message in each new topic that is posted to the group—so you can then decide whether to follow that topic—select the First Message Also checkbox when you set the Following Only preference for your subscription.
If you receive individual email messages from the group, and you selected First Message Also in your subscription preferences, the footer in those messages contains a Follow This Topic link and links to follow any hashtags associated with that topic. If you did not select First Message Also, you can select which topics to follow using the Groups.io website.
Email messages other than the first one in a topic include an Unfollow This Topic link and links to unfollow any hashtags associated with that topic. If you receive message digests, the follow or unfollow links are at the end of each message in the digest. Clicking or tapping these links takes you to the group’s website, where you can confirm or cancel the action.
Note: If the owner has set the group’s Reply To setting to “Topic Followers Only,” you will, by default, be following any topics you create in that group. Therefore, regardless of whether you set the Following Only preference in your email subscription for that group, you will see an Unfollow This Topic link in the email footers of topics that you create.
When you are viewing messages on the group’s website, in either Topics view or Messages view, you can click or tap the Follow This Topic button that is displayed at the top of each topic page or individual message’s page to follow that topic.
For hashtags: When you have selected Following Only in your email subscription for the group, you will see a Follow/Notify button (or link), instead of a Mute/Notify button (or link), on the group’s Hashtags page and on individual hashtag pages. To follow specific hashtags—so you receive messages in topics that are tagged with those hashtags—you can use any of these methods:
- In a group email message, click or tap Follow for any hashtag listed in the message footer.
- On the Hashtags page on the group’s website, click or tap the Follow/Notify button (or link, if you are viewing the page in List View) in the hashtag. On the resulting page, in the Email panel, select the Follow Topics checkbox, and select a length of time from the Follow Duration list. Then click or tap the Update button at the bottom of the page.
- On an individual hashtag’s page, click or tap the Follow button near the top. On the resulting page, select the Follow Topics checkbox, select a length of time from the Follow Duration list, and then click or tap the Update button.
- When you are viewing a topic on the group’s website, hashtags are displayed next to the topic’s subject line. In that view, you can click or tap the down arrow in a hashtag to display a dropdown menu, then select Follow from that menu. On the resulting page, select the Follow Topics checkbox, and select a length of time from the Follow Duration list. Then click or tap the Update button at the bottom of the page.
Tip: Consider setting a specific duration limit (as opposed to following the hashtag forever) because the same hashtag could be used in future topics that you might not be interested in.
Unfollowing topics or hashtags
To unfollow topics or hashtags that you are following, use any of the methods mentioned in Following topics or hashtags above. The button or link will be labeled “Unfollow” instead of “Follow.”
Managing muted and followed topics
The Topics home page on the Groups.io website provides a place where you can manage the topics that you have muted or are following in all of your group subscriptions:
- At the top of any group page, click or tap the Groups.io logo on the far left in the blue header. This action takes you to the most recent Groups.io home page that you viewed.
- Desktop browser: On the resulting page, select Topics from the left menu to display a submenu. In the submenu, select Muted or Followed, depending on which topics you want to manage.
Mobile device: On the resulting page, tap the More icon at the bottom. On the More menu, select Muted Topics or Followed Topics, depending on which topics you want to manage. - On the resulting page, find the topic you want, and click or tap its link to open it.
- At the top of the topic’s page, click or tap the applicable button to take the associated action:
- Mute This Topic
Stop email delivery of messages in that topic.
- Unmute This Topic
Resume email delivery of messages in that topic.
- Follow This Topic
Start email delivery of messages in that topic.
- Unfollow This Topic
Stop email delivery of messages in that topic.
- Mute This Topic
Managing muted and followed hashtags
The Hashtags home page on the Groups.io website provides a place where you can manage the hashtags that you have muted or are following in all of your group subscriptions:
- At the top of any group web page, click or tap the Groups.io logo on the far left in the blue header. This action takes you to the most recent Groups.io home page that you viewed.
- Desktop browser: Select Hashtags from the left menu to display a submenu. In the submenu, select Muted or Followed, depending on which hashtags you want to manage.
Mobile device: Tap the More icon at the bottom of the page. On the More menu, select Muted Tags or Followed Tags, depending on which hashtags you want to manage. - On the resulting page, you can:
- Remove a hashtag from the list by selecting the checkbox next to it and then clicking or tapping the Remove button (for muted hashtags) or Delete button (for followed hashtags).
- Add a hashtag to the list by clicking or tapping the Mute A New Hashtag link (for muted hashtags) or Follow A New Hashtag link (for followed hashtags) at the upper right of the page.
If you are not receiving email messages from a group that you are subscribed to, you can check your email delivery history for the group:
- Log in to Groups.io and go to the group’s website.
- Desktop browser: In the left menu, select Subscription > Delivery History.
Mobile device: At the bottom of a page in the group, tap the More icon and then select Subscription > Delivery History on the More menu. - On the resulting Email Delivery History page, review the information to see whether you can determine why messages from the group have not been delivered to you. (On a mobile device, use landscape orientation to see the page more clearly.)
Tip: If the Bounces panel at the bottom of the Email Delivery History page shows that email to you has been bouncing, see Dealing with bouncing accounts.
Note: The Groups.io system stores only the 20 most recent successful and attempted email delivery results.
! Important: Make sure you are sending email from the email address that is registered with your Groups.io account (or from an email alias that you added to your Groups.io account).
To send a new group message (create a topic) by email, create the message in your email application as you normally would, provide a descriptive subject line, and enter the group’s address in the To field. A group’s email address typically has the format groupname@groups.io. The group’s email addresses are listed on the group’s home page on Groups.io.
To reply to a group message by email, you can use either of these methods:
- Use the Reply function of your email application.
- In the footer of the message you want to reply to, click or tap the applicable Reply link. The links available in the footer depend on the text format of the message and on how the Reply To option is set for the group (or for a specific topic or hashtag).
Tip: To reply privately to the original sender of the message and not to the entire group, click or tap the Reply To Sender link in the message footer.
Note:
- The size limit for an individual email message is 100MB in Free groups and 200MB in Premium and Enterprise groups. Individual attachments are limited to a maximum size of 15MB; attachments larger than that are stripped and links to them are sent instead. Be aware that some recipients’ email systems might have smaller message size limits.
- If you send 40 or more messages within 30 minutes to the same group from the same email address, the system will bounce those messages, and you will receive a notice from the system that says: “We have received more than 40 messages in 30 minutes from you. To guard against autoresponder mail loops, we must reject additional messages from you temporarily. Please try again later.” This limit is in place to circumvent, for example, an incorrectly configured vacation responder where one message to a group the member is subscribed to could set off a chain reaction. It also serves as a spam prevention measure.
Text editor tips
You can set your preferred text editor (HTML, Markdown, or Plain Text) in your Groups.io account preferences. See Setting your preferred text editor.
In the HTML editor, in a desktop browser, you can display another toolbar with additional editing options by clicking the More options icon (...) at the far left on the formatting toolbar. On a mobile device, all of the HTML editing options are on the toolbar, and you can scroll the toolbar to display them.
Posting a new topic
- Desktop browser: On the group’s website, in the left menu, select New Topic.
Mobile device: In the group, tap the New Topic icon at the bottom of a page. - On the New Topic page, enter a descriptive subject line, and enter and format the text of your topic. If applicable, use the Add Tags list to select hashtags to add to the subject line.
Note: If you are the group owner or a moderator, you can also select a checkbox to send the topic as a special notice or to lock the topic immediately after it is posted (or both). - Click or tap the Send button at the bottom of the page.
Replying to a message
- In the group, locate the message you want to reply to.
- Click or tap the Reply link below that message’s text.
- In the To list above the subject line, select the recipient of the reply:
- To send your reply to the entire group, select Group.
- To send your reply only to the message’s sender, select Sender. If you want to blind copy yourself, select the BCC Me checkbox below the text editor box.
- To send your reply only to the group’s moderators, select Moderators. If you want to blind copy yourself, select the BCC Me checkbox below the text editor box.
Note: The default option might be either to reply to the group or reply only to the sender of the message you are replying to, depending on the settings the owner specified for the group. If the owner has not disabled the other reply option, you can select the applicable option on the list to choose where to send your reply.
- In the text editor box, enter and format the text of your reply.
Note: If you are the group owner or a moderator, you can also select the Lock Topic After Posting checkbox to lock the topic immediately after the reply is posted. - Click or tap the Send button.
Quoting messages you are replying to
Note: This topic covers quoting messages that you are replying to on a group’s website. If you are replying to messages via email, the method for automatically including quoted messages in replies as well as where quoted text is placed (for example, at the top or bottom of the message) depend on the specific email application you are using.
When you are replying to a message on a group’s website, you can automatically include (quote) all or part of that message in your reply.
To quote the entire message you are replying to:
- Under the message you want to reply to, click or tap the Reply link.
- On the text formatting toolbar above the text editing box, click or tap the Quote post icon at the far left (in a desktop browser, it is to the right of the More options icon). The message text is inserted automatically at the top of your reply’s text editing box, along with the message’s posting date and time and the author’s name.
To quote only part of the message you are replying to:
- While viewing the message you want to reply to, select the specific text that you want to quote. (You do not need to use a copy function.)
- Click or tap the Reply link under the message. The text you selected is inserted automatically at the top of your reply’s text editor box, along with the message’s posting date and time and the author’s name.
Working with draft messages
When you are composing a message on a group’s website or on a mobile device, Groups.io automatically saves a draft of the message periodically. If you click or tap outside the message editor or even leave the page, Groups.io saves the draft up to that point and adds a Drafts entry for that group to the left menu in a desktop browser and the More menu on a mobile device. You can click or tap Drafts to see the drafts that the system has saved, and from there you can open and send a draft or discard it.
Note:
- The system automatically deletes drafts 90 days after their last edit.
- If you create too many drafts, Groups.io displays a notice at the top of the page that you must delete some drafts before more drafts can be saved.
- Messages that have hashtag issues (such as containing a restricted hashtag) are bounced by the system, not held as drafts to be corrected. To avoid this situation, make sure that you are familiar with the group’s rules and guidelines for using hashtags.
Similar to social media apps and websites, Groups.io has a feature allowing group members to indicate they like messages that are posted to the group. You can use either of these methods to like a group message:
- When you are reading a message on the group’s website or in the mobile app, click or tap Like at the bottom center of the message.
- By email, reply to the message you want to like and enter either +1 or the word like as the text of your reply. (If your reply automatically quotes the message you are replying to, delete all the quoted text so your reply contains only +1 or like.) This reply will not be sent to group members or appear in the message archive on the group’s website, but your like will be included in the count of likes under that message on the website.
Note: Enterprise groups can opt to disable the function that converts “+1” email messages to likes.
Related help topic
Related help topic
Searching by keyword
Desktop browser:
- Go to the group’s Messages page.
- In the Search box at the upper right of the page, enter the keywords you want to search for.
- Click the magnifying glass icon at the right of the Search box.
Mobile device:
- Go to the group’s Messages page.
- Tap the magnifying glass icon at the top right of the page.
- In the Search popup, enter the keywords you want to search for, then tap Search.
You can filter the search results by clicking or tapping the Tools button at the top of the page to display tools that allow you to:
- Specify a date range: Click or tap the Any Time button and select a range from the dropdown menu.
- Group the messages into their topics: Select the Collapse Topics checkbox.
- Exclude any message signatures that contain the keywords: Select the Exclude Signatures checkbox.
Tips:
- The message search engine uses the standard Boolean operators AND, OR, and NOT. If you include these operators in your search query, you must put them in all uppercase (otherwise, the search engine assumes you are looking for those actual words). If you enter more than one word in the Search box, the AND operator is implied.
- You can search for exact phrases by putting them in quotes. Example: “message formatting”
- The search engine matches only whole words. However, you can include the wildcard character, an asterisk (*), to find variations of a word. Example: A search on telescop* will find telescope, telescopes, telescoping, and so on.
Searching by posted date
- Go to the group’s Messages page.
- Click or tap the Filter button at the top of the page.
- Click or tap the Any Time button and select a date range from the dropdown menu.
Searching for messages from a specific group member
The Groups.io message search engine does not include message From and To fields in its searches. If you want to search for all messages that were posted by a specific group member:
- Go to the group’s Messages page.
- Find and expand a recent message that was posted by the member in question.
- Click or tap the member’s display name and select All Messages By This Member from the dropdown list.
When the search results are displayed, you can click or tap the Tools button at the top of the page to filter the results further, if desired.
Searching by hashtags
You can use these methods to search for messages by hashtags:
- When you are searching for messages by keyword, include a hashtag in your search string. Ensure that you include the hashtag character (#).
- On the Topics page or the Messages page, click or tap the Filter button at the top of the page, then click the Hashtags button. Select one or more hashtags from the dropdown list, then scroll to the bottom of that dropdown list and click or tap Search.
Note: If you select more than one hashtag, the system searches for topics that have all the selected hashtags (that is, the search is an AND operation, not an OR operation). - Go to the group’s Hashtags page. You can then click or tap a hashtag on that page to display the messages that have it.
Searching by message number
To search for a message using its ID number:
- Go to the group and display posts in Messages view or Expanded view.
- In the Msg # field that appears at the upper right next to the Date link, enter the number of the message you are searching for.
Note: On a mobile device, you might need to use landscape orientation to see the Msg # field. - Press or tap Enter.
- In the search results, the message will not be at the top of the page unless it happens to fall on a page break. If the message is not at the top of the page, you must scroll to find it:
- In Messages view, the message you searched for will have a vertical blue bar on its left edge. Scroll down the page until you see that blue bar.
- In Expanded view, scroll until you come to the message with the number that you searched for. (Expanded view does not include a vertical blue bar indicating the specific message.)
In a Premium or Enterprise group, the owner can allow members to repost messages to the group and can specify the maximum number of times that a message can be reposted. For example, a group that posts classified ads might allow members to repost ads after a specified period of time if items are not sold.
Note:
- Reposted messages are tagged automatically with the #repost hashtag.
- You can repost only your own messages.
- The message you repost must be the first one in the topic. Replies cannot be reposted.
To repost a message in a group that allows reposting:
- After the number of days before reposting is allowed have elapsed, go to the group’s website and display the message that you want to repost.
Note: The group’s owner or a moderator sets the number of days before messages can be reposted. - Look for and click or tap More at the lower right of the message.
- In the popup menu, select Repost [subject to group limits].
- In the Verify Repost confirmation popup, click or tap Yes.
Related help topic
Instructions for group members
A group’s owner might allow members to make changes to the content of their own messages in the message archive (that is, after the messages have been posted to the group).
Group members who are not owners or moderators can edit only messages that they have posted.
! Important: In this situation, edited messages are emailed to all group members automatically. Think carefully about whether you really need to flood other members’ email inboxes with minor corrections such as fixed typos.
To edit the content of a message that you posted:
- On the group’s website, locate and open the message you want to edit.
- Click or tap More at the lower right of the message and select Edit Message from the popup menu.
- On the Edit Message page, make your changes. In addition, it is good practice to include a short note that explains your edits. Enter the note in the text box under the body of the message. That note will be included in the updated message that is sent to the group.
Note: You cannot change the subject line because it appears in all messages that are in that topic. Only group owners and moderators with the appropriate permissions can change a topic’s subject line. - Click or tap the Save And Send To Group button. The edited message is sent to all group members.
In the archive, a blue Edited badge appears next to the message, at the far right under the original timestamp. All group members can click or tap that badge to see the message’s history and, if desired, compare revisions.
Instructions for group owners and moderators
Owners, and moderators with the appropriate permissions, can edit the content of all messages that are in the message archive on the group’s website.
Note:
- To edit messages before they are delivered by email and posted to the archive, you need to use some form of moderation on members or messages.
- To change a topic’s subject line or hashtags, you need to edit the topic’s properties. See Editing the properties of topics in the archive.
To edit the content of a message that has already been posted to the group:
- On the group’s website, locate and open the message you want to edit.
- Click or tap More at the lower right and select Edit Message from the popup menu.
- On the Edit Message page that appears:
- Make your edits to the body of the message.
- In the text box after the message body, add a brief note about the change.
Note: This note is optional but recommended so the reason for the change is documented. The note appears in the edited message if you choose to send it to the group by email. The note also can be viewed by members who click or tap the blue Edited badge that appears next to edited messages on the group's website.
- Click or tap the appropriate button:
- Save and Send to Group: Use this button if you want to send the edited message to the group by email. The message will include a statement that the message was edited along with the note you entered.
- Save Without Sending: Use this button if you want to just save the edited message in the archive without emailing it to all group members. A copy will be sent to the original poster.
The message is sent or saved, according to the action that you took. In the archive, a blue Edited badge appears next to the message, at the far right under the original timestamp. All group members can click or tap that badge to see the message’s history and, if desired, compare revisions.
Group members can delete their own messages in the archive. Group owners and moderators with the appropriate permissions can delete any messages in the archive.
To delete an individual message within a topic (not the entire topic):
- On the group’s website, display the message you want to delete.
- Click or tap More under the message at the lower right.
- Select Delete Message from the submenu that appears.
- When the Verify Delete confirmation popup appears, click or tap Yes.
Note: Members who received the message by email will still have a copy (unless they deleted it from their email applications).
Related help topic
To report a message to the group’s moderators (for example, because you think it is not appropriate for the group) or to Groups.io Support (for example, because you think it violates the Groups.io Terms of Service):
- On the group’s website or in the the mobile app, open the message you want to report.
- Look for and click or tap More at the lower right of the message.
- In the popup menu, select Report This Message.
- In the Report Message popup, enter the reason you are reporting the message.
- Select Report to Moderators or Report to Groups.io Support, as applicable.
- Click or tap Report. An email message with the subject “Content flagged as inappropriate” is sent to the group moderators or to Groups.io Support. Your email address is included in that message.
Note: The sender of the message you reported is not notified about the complaint. It is up to the group’s moderators or Groups.io Support to determine how to act on your complaint.
Some email providers notify Groups.io when group messages end up in the provider’s users’ spam folders. Most likely, the group messages were automatically flagged as spam by the email provider rather than having been specifically marked as spam by the users.
When Groups.io receives such a notification from an email provider, the system automatically unsubscribes that member from the group. Groups.io also sends the member an email with a link that lets them automatically and quickly resubscribe to the group if the spam flagging was a mistake.
If you receive a notification from Groups.io that you were removed from a group because of reported spam:
- Click the link in the notification message that automatically resubscribes you to the group.
Note: The link expires 7 days after the notification was sent. - Check the spam folder in your email application, and if that folder contains messages from Groups.io, mark those messages as not spam. Doing so will help train the email provider’s spam filters to make fewer mistakes about Groups.io emails.
! Important: Do not delete the messages from the spam folder or allow them to be automatically deleted from it. Otherwise, the email provider will likely continue flagging Groups.io messages as spam.
For additional information about this situation, see the wiki in the GroupManagersForum group.
If the group’s owner has allowed it, you can download the message archive for the group:
- At the top of any message view page, look for and click or tap the Export Group Data button.
Note:- On a mobile device, you might need to use landscape orientation to see the button.
- If you do not see this button at all in a desktop browser, mobile browser, or the mobile app, the group’s owner has not allowed members to download the message archive.
- On the resulting page, in the Data to Export panel, select the Messages checkbox (it will be the only option).
- Click or tap the Export Group Data button below the Data to Export panel. Groups.io displays a green banner at the top of the page stating that your request has been submitted and that you can expect an email with a link to download a zip file (a compressed archive file) within 10 minutes.
- When you receive the email (the sender is Groups.io User Export Service, and the subject is “Export of [the group’s email address]”), click the Download Group Export link, and open or save the zip file.
Note: The download link in the email is valid for 24 hours.
The zip file contains the message archive in mbox format, which you can open using an email client such as Mozilla Thunderbird or Apple Mail.
About digests
Group members who receive group messages by email can choose to receive digests of messages rather than receive each message individually as it is sent. You can choose to receive digests in HTML (full-featured) format or in plain text format. Alternatively, you can choose to receive daily summaries that list the topics and replies that were posted to the group the previous day. These settings are under Email Delivery on your Subscription page for the group.
To generate digests, the system groups a day’s messages into batches of 12 and delivers each batch in one digest message when the twelfth message is posted. The digests include the full text of each message, omitting any quotes of previous messages.
Note: If a digest had not been generated in the previous 6 hours and messages were posted to the group since the last digest, a digest is created at 6:00 AM local time for each member, based on the timezone in the member’s account preferences.
Full-featured digests
The top of a full-featured digest includes a list of the topics it contains. Each topic listed is a link you can click to go directly to that topic within the digest. If a topic has a number after it, that number is the count of messages in the topic that are included in the digest.
Example
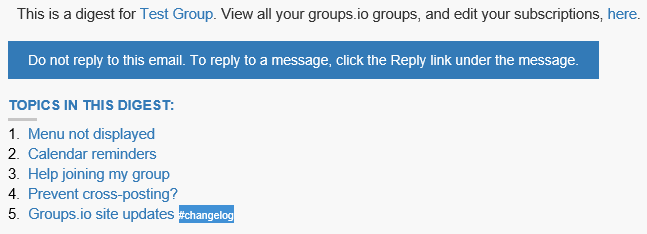
After the list of topics are the messages that were posted, with a footer after each message. For more information, see Footers in digests.
Note: In a full-featured digest, the number of images included per message is limited to two. All other message attachments are included as links to the group’s website.
Plain text digests
The top of a plain text digest includes a list of the topics it contains. The topics in that list are not links. If a topic has a number after it, that number is the count of messages in the topic that are included in the digest.
The group’s email address, group web address, and unsubscribe web address might appear as links (as in the example below) if your email application automatically creates links from text that appears to be email addresses or web addresses.
Example
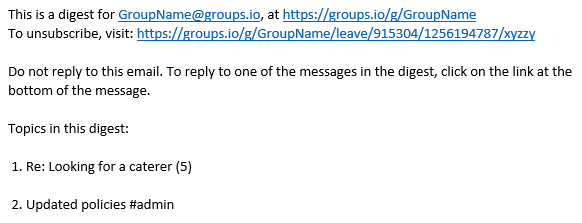
After the list of topics are the messages that were posted, with a footer after each message. For more information, see Footers in digests.
Daily summaries
A daily summary contains a list of messages (topics or replies) that were posted the previous day. Unlike the digests, the summary does not include the text of any of the messages. For replies to an existing topic, the summary contains a link to the topic, not to the individual reply.
The summary is created at 6:00 AM local time for each member, based on the timezone in the member’s account preferences.
Full-featured digests
Full-featured digests have a footer under each message in the digest plus a different footer at the end of the entire digest.
The footers under individual messages in the digest look similar to this example:
![]()
Other links that might appear in individual message footers include Mute This Topic, Unfollow This Topic, and Mute #hashtagname (with the specific hashtag name displayed). The links in the digest behave similarly to the ones in individual HTML messages.
The footer at the end of the entire digest looks similar to this example:
![]()
Plain text digests
Plain text digests have a footer under each message in the digest plus a different footer at the end of the entire digest.
The footers under individual messages in the digest look similar to this example:

The group owner email address and group web addresses might appear as links (as in the examples above and below) if your email application automatically creates links from text that appears to be email addresses or web addresses. Other links that might appear in individual message footers include Follow This Topic and Unfollow This Topic. The links in the digest behave similarly to the ones in individual plain text messages.
The footer at the end of the entire digest looks similar to this example:

Formatted (HTML) messages
The footer in an individual group email message that is in HTML format looks similar to this example:
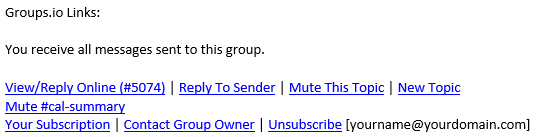
Note: The footer might also contain some customized, group-specific or hashtag-specific content.
Plain text messages
The footer in an individual group email message that is in plain text format looks similar to this example:
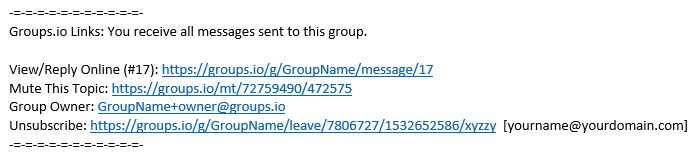
The group owner email address and group web addresses might appear as links (as in the example above) if your email application automatically creates links from text that appears to be email addresses or web addresses.
Note: The footer might also contain some customized, group-specific or hashtag-specific content.
Footer elements
Based on the format of an individual message (HTML or plain text) and the group's Reply To settings, these elements can appear in the message's footer:
- “You receive all messages sent to this group.”
The statement that appears here reflects the Message Selection setting on your Subscription page for the group.
This statement appears in both HTML and plain text messages.
- View/Reply Online (#nnn)
This link goes to the message on the group’s website. The number in parentheses is the message number in the archive.
This link appears in both HTML and plain text messages.
- Reply To Group
(Not shown in the HTML example above)
This link is a mailto: link that opens a new message composition window in your email application. The group’s email address will be entered automatically in the To field.
Note: The message you are replying to will not be quoted in your reply even if your email application is set up to quote messages that you reply to. If you want to quote the message, you can copy and paste its text into your reply, or you can click or tap the View/Reply Online link and then use the reply quoting features on the group’s website.
This link appears only in HTML messages.
- Reply To Sender
This link is a mailto: link that opens a new message composition window in your email application. The message sender’s email address will be entered automatically in the To field. Also, the callout “Private:” is added to the beginning of the subject line.
Note: The message you are replying to will not be quoted in your reply even if your email application is set up to quote messages that you reply to. If you want to quote the message, you can copy and paste its text into your reply, or you can click or tap the View/Reply Online link and then use the reply quoting features on the group’s website.
This link appears only in HTML messages.
- Mute This Topic
This link opens a page on the group’s website where you can confirm that you do not want to receive further email replies to that topic.
This link appears in both HTML and plain text messages.
- Follow This Topic
(Not shown in the examples above)
This link opens a page on the group’s website where you can confirm that you want to receive further email replies to that topic.
This link appears in both HTML and plain text messages.
- Unfollow This Topic
(Not shown in the examples above)
If you are following the topic (either because you specifically chose to or because it is a topic that you created in a group in which the owner set the group’s Reply To setting to “Topic Followers Only”), this link opens a page on the group’s website where you can confirm that you want to stop receiving further email replies to that topic.
This link appears in both HTML and plain text messages.
- New Topic
This link goes to the New Topic page on the group’s website, where you can create a new topic.
This link appears only in HTML messages.
- Mute #hashtagname
(Not shown in the plain text example above)
This link opens a page on the group’s website where you can confirm that you do not want to receive further email replies to topics that have the indicated hashtag.
This link appears in both HTML and plain text messages.
- Unfollow #hashtagname
(Not shown in the examples above)
When you are following a hashtag, this link appears. It opens a page on the group’s website where you can confirm that you do not want to receive messages in topics that have the indicated hashtag.
This link appears in both HTML and plain text messages.
- Your Subscription
This link goes to your Subscription page for the group.
This link appears only in HTML messages.
- Contact Group Owner (in HTML format) or Group Owner (in plain text format)
This link is a mailto: link that opens a new message composition window in your email application. The owner email address for the group will be automatically entered in the To: field.
This link appears in both HTML and plain text format.
- Unsubscribe
This link opens a page on the group’s website where you can confirm that you want to unsubscribe this email address from the group.
This link appears in both HTML and plain text messages.
Group owners can add customized, group-specific content to all message footers and add footers to individual hashtags.
When a message footer contains group-specific content, that content is placed between separators added by the system. In the examples below, customized content is highlighted in yellow.
Plain text example
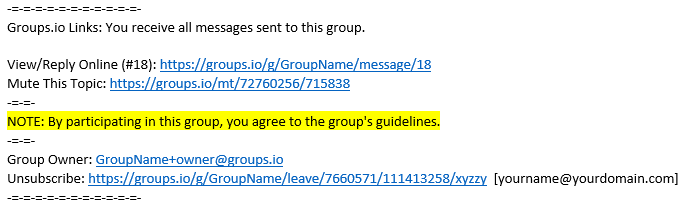
Formatted (HTML) example
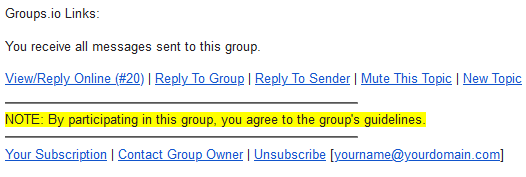
If the message has a hashtag that includes a footer, the hashtag footer is displayed above the “Groups.io Links” line. In a digest, a hashtag footer is displayed immediately after the body of the message that contains the hashtag.
Note: To view any of a group’s web features, you must be logged in to your Groups.io account.
See Logging in to your account.
Directory of members' profiles
Restriction: This feature is available only in Premium groups, Enterprise groups, and legacy Free groups.
A group owner can choose whether to allow the members of the group to see the directory of members’ profiles. If a Directory entry appears in the left menu on the group’s website (desktop browser) or on the More menu (mobile device), the owner has allowed group members to see the directory. Click or tap the Directory entry to view the directory.
On the Directory page, you can click or tap an individual member’s display name to view their individual profile.
Note:
- The directory of members’ profiles is different from the group’s member list.
- The directory does not necessarily contain all group members. Only members who have chosen to make their profile visible can see other members who have opted to be included in the directory.
- From the directory, you can send an email directly to another member by clicking or tapping the Message button in their entry. The limit is two emails per day to the same person, with a total limit of 10 emails per day per group.
- If you think an individual member’s profile it is inappropriate for the group or violates the Groups.io Terms of Service), you can report it to the group moderators or to Groups.io Support using the Report This Profile button at the lower right on that member’s profile page.
Related help topic
In a restricted membership group, the group owner can choose whether to allow the members of the group to see the member list. If a Members entry appears in the group’s left menu in a desktop browser or on the group’s More menu in the mobile app or a mobile browser, the owner has allowed group members to see the member list. Click or tap the Members entry to view the list.
Note: The member list is different from the directory of members’ profiles.
The member list contains group members’ display names, email addresses, email delivery methods, and the dates they joined (or were approved to join) the group. In Premium and Enterprise groups, the member list might contain additional member data fields added by group owners.
Certain colored badges (icons) might appear in the entries in the member list. For a list of these badges and their descriptions, see Member badges.
You can filter the member list to display only the members who are in certain categories or who have a certain status:
- At the top of the Members page, click or tap the Filter button.
- When the filter list appears, select the checkbox for the category or status by which you want to filter the member list. You can select more than one checkbox.
- ! Important: Go to the bottom of the filter list and click or tap Apply.
Subscribing to a group's calendar
Editing or deleting calendar events
Downloading event iCalendar (ICS) files
Adding events from outside calendar invitations
Restriction: This feature is available only in Premium groups, Enterprise groups, and legacy Free groups.
Groups.io provides a Calendar feature that members can use to view and create group events.
Group owners determine whether the Calendar feature is available in their groups and, if it is, who can view and create events: the general public (view only), all group members, or only group owners and moderators.
Restriction: This feature is available only in Premium groups, Enterprise groups, and legacy Free groups.
Desktop browser: On the group’s website, in the left menu, click Calendar.
Mobile device: At the bottom of a group page, tap the More icon, then tap Calendar on the More menu.
Note: If you do not see a Calendar entry on the menu, then the Calendar feature is disabled for that group, members are not allowed to view the calendar, or the group is a Free group that was created after August 24, 2020.
Click or tap an event’s name to display a popup that summarizes the event. You can click or tap the See more details button at the bottom of the popup to display the event’s details page.
On the Calendar page, you can change the view of the calendar by clicking or tapping the button at the upper right and selecting the view you want: Month, Week, Day, or List. In Premium, Enterprise, and legacy Free groups, an additional selection, RSVPed only, is available. That selection displays only the RSVP events to which you responded you will attend. For more information, see Using the RSVP feature.
Tip: Groups.io also provides a consolidated calendar that contains events from the calendars of all the groups you belong to. See Your Calendar home page.
Restriction: This feature is available only in Premium groups, Enterprise groups, and legacy Free groups.
You can subscribe to a Groups.io calendar from another calendar such as Google Calendar, Microsoft Outlook, or Apple Calendar, as long as that calendar supports iCalendar format.
To subscribe to a group’s calendar from another calendar:
- Display the group’s calendar.
Desktop browser: On the group’s website, in the left menu, click Calendar.
Mobile device: At the bottom of a group page, tap the More icon, then tap Calendar on the More menu.
- At the bottom of the page, click or tap the Subscribe to Calendar button to display and copy the iCalendar URL of your Groups.io calendar.
- Go to the other calendar, and add the group calendar’s URL according to the other calendar’s instructions.
Note: The subscription (synchronization) is only one way, from Groups.io to the other calendar.
Tip: You can subscribe to your consolidated group calendar by clicking or tapping the Subscribe to Calendar button at the bottom of Your Calendar home page.
Restriction: This feature is available only in Premium groups, Enterprise groups, and legacy Free groups.
To add an event to a group calendar:
- Display the group’s Calendar page.
Desktop browser: On the group’s website, in the left menu, click Calendar.
Mobile device: At the bottom of a group page, tap the More icon, then tap Calendar on the More menu.
- Click or tap the Add Event button at the bottom of the page.
Tip: In a desktop browser, you can also click a date in Month view, a time in a date column in Week view, or the time in Day view.
Note: If the group does not allow members to add calendar events, the Add Event button is inactive and it is not possible to select a date or time. - Complete the elements on the Add Event page:
- Event Information
- In the Event Name field, enter the name of the event the way you want it to be listed on the calendar.
! Important: This name is required.
Tip: You can enter hashtags in the Event Name field. Make sure you include the hash character (#), and put a space before each hashtag (and after a hashtag if it is the middle of the text). - Select the start date, end date, start time, end time, and (if necessary) timezone. If the event does not have a specific time, select the All Day checkbox, which removes the Start Time and End Time fields.
- In the Event Name field, enter the name of the event the way you want it to be listed on the calendar.
- Repeats
If the event is a repeating event, select the Event Repeats checkbox in the Repeats panel to display additional fields where you can select when and how often the event is repeated and when to end the repeating event.
- Other Info
Complete the desired fields in this panel. Be aware that:
- A Google Maps link is created for an address or place entered in the Location field.
- In the Organizer Email field, a mailto: link is created for the email address.
Note: By default, your (the event creator) email address is in this field. If you change the email address and it belongs to another member of the group, that member will have editing privileges for the event. - In the Organizer Phone field, a tel: link is created for the telephone number.
Tip: The fields in this panel are optional, but completing them can simplify finding an event’s location or contacting an event’s organizer. You can also click or tap the Event Color box to assign a color to the event. Colors can be useful for visually categorizing events on the calendar.
- RSVP
- Reminders
If desired, click or tap the Add Reminder button in this panel to add one or more reminder notifications that will be sent to the group before the event occurs. Click or tap Add Reminder for each reminder you want to add. For example, you might want a reminder to be sent to the group 4 weeks before the event and another reminder to be sent 1 week before the event.
Note:
- Reminder notification messages are tagged automatically with the #cal-reminder system hashtag.
- The system ignores any reminder entered for less than 1 minute before the event. (The page does allow such a reminder to be entered initially, but if you edit the event later, that reminder will not be listed.)
- Send Notice To Group When Event Happens
Select this check box if you want a notification message to be sent to the group automatically at the time the event occurs. The message will be tagged with the #cal-notice system hashtag.
- Event Information
- When you have completed the Add Event page, go to the bottom of the page and click or tap the applicable button:
- Add Event: Add the event to the calendar without sending a notification to group members that the event was added.
- Add Event & Invite Group: Add the event to the calendar and send an email to group members with an attached iCalendar (ICS) file. Members can add that ICS file to their personal calendars if desired.
Note: A #cal-invite system hashtag is automatically added to the e-mail’s subject line. - Back: Return to the calendar page if you change your mind about adding the event.
Restriction: This feature is available only in Premium groups, Enterprise groups, and legacy Free groups.
Editing an event
Note: Members can edit only events that they have created (if the group settings allow members to create and edit calendar events). Owners and moderators can edit any event. If you do not see an Edit button (step 2), you do not have permission to edit the event.
- Display the group’s calendar.
Desktop browser: On the group’s website, in the left menu, click Calendar.
Mobile device: At the bottom of a group page, tap the More icon, then tap Calendar on the More menu.
- Find the event, click or tap its name to open its popup summary, then click or tap the Edit button.
- Make your changes to the event’s details.
- Go to the bottom of the page and click or tap the applicable button:
- Update Event: Update the event on the calendar without sending a notification to group members that the event was updated.
- Update Event & Group: Update the event on the calendar and send an email to group members notifying them that the event was updated.
Deleting an event
Note: Members can delete only events that they have created (if the group settings allow members to create and edit calendar events). Owners and moderators can delete any event. If you do not see an Edit button (step 2), you do not have permission to delete the event.
- Display the group’s calendar.
Desktop browser: On the group’s website, in the left menu, click Calendar.
Mobile device: At the bottom of a group page, tap the More icon, then tap Calendar on the More menu.
- Find the event, click or tap its name to open its popup summary, then click or tap the Edit button.
- Go to the bottom of the page and click or tap the Delete Event button at the far right.
- In the Verify Delete confirmation popup that appears, click or tap Yes.
Note: If you want to notify group members about the deletion, select the Send Notice To Group checkbox before you click or tap Yes. The email notice will contain an iCalendar (ICS attachment) that members can open to delete the event from their personal calendars if desired. The email notice will also include the #cal-cancelled system hashtag.
Restriction: This feature is available only in Premium groups, Enterprise groups, and legacy Free groups.
If you want to add a copy of an event on a group’s calendar to a personal calendar that supports iCalendar format, you can download an ICS file for the group event:
- Display the group’s calendar.
Desktop browser: On the group’s website, in the left menu, click Calendar.
Mobile device: At the bottom of a group page, tap the More icon, then tap Calendar on the More menu.
- Find the event, click or tap its name to open its popup summary, then click or tap the See more details button.
- On the event’s details page, in the Date and Time section, click or tap the Add to Calendar link. Depending on your brower or device’s settings, you can then save or open the ICS file.
Restriction: This feature is available only in Premium groups, Enterprise groups, and legacy Free groups.
Members who are permitted to add group calendar events can add events from outside calendars (such as Google Calendar and Microsoft Outlook) to the group’s calendar:
- In the outside calendar application, create an event (or appointment or meeting) as you normally would.
- In that event, add the group’s email address (typically in the form groupname@groups.io) as a guest or attendee.
- Send the outside calendar event invitation.
Group members receive the event invitation by email, and the event also is automatically added to the group’s calendar.
Example: You create an event in Google Calendar and add the Groups.io group as a guest. This action generates an email message that is sent to the group with a calendar invitation. Assuming you have permission to add group calendar events, Groups.io creates an event in the group’s calendar in addition to sending the calendar invitation email to the group members.
Restriction: This feature is available only in Premium groups, Enterprise groups, and legacy Free groups.
About the RSVP feature
In a Premium, Enterprise, or legacy Free group, members who are permitted to add calendar events can request RSVPs to events and use these additional RSVP features:
- Specify a maximum number of attendees for the RSVP event. (The group will maintain a wait list.)
- Specify whether RSVP attendees can bring guests.
- See a directory of people who have responded, and send email messages to only those who replied Yes or No.
- Change members’ responses.
- Export a list of RSVP attendees.
- Create name tags for RSVP attendees, using a variety of Avery templates.
Requesting RSVPs to an event
To request RSVPs when you are adding a calendar event, look for the RSVP panel near the bottom of the Add Event page and ensure that the Request RSVP checkbox is selected (in a new event, it is selected by default). These additional elements are included in the RSVP panel:
- Maximum # Attendees (0 means unlimited)
To set a maximum number of attendees for the event, enter the number in this field. (Leave the number as 0 if you do not want to limit the number of attendees.)
Note:
- This number includes any guests (if you select the checkbox below).
- When the number of yes responses (including guests) reaches the maximum number you set, additional members who respond yes are placed on a wait list. If a member who is on the attendee list later updates their response to no, the first member on the wait list is added to the event automatically, and that member receives an email confirmation.
- Attendees can bring guests
Select this checkbox if you want to allow attendees to bring guests. The event page that members use to RSVP will contain a button that attendees can use to specify the number of guests they will bring.
- Additional Information Requested from Attendees
In this field, you can enter a question that you would like attendees to answer when they respond to the RSVP. For example, for a potluck dinner event, you could ask “What will you bring?”
Note: The information entered in this field by responders is visible only to event creators, group owners, and group moderators who have the appropriate permissions.
- Note To Send Attendees
In this field, you can enter information (for example, additional details) that will be sent by email to members who respond that they will attend the event.
Note: If a respondent ends up on a waitlist, they will not receive this note.
When you have completed the Add Event page to your satisfaction, click or tap Add Event & Invite Group. Group members will receive an email invitation containing a link they can click to respond to the event. The invitation will also have an attached iCalendar (ICS) file. Members can add that ICS file to their personal calendars if desired.
Note: The RSVP link in the email invitation goes to the event’s page on the group website, so members who RSVP will need to log in to Groups.io if they are not logged in already.
Exception: Gmail and Outlook users will see response buttons in the email invitation, which they can click or tap to respond to the invitation without going to the group website. In Gmail, the buttons are labeled Yes, No, and Maybe; in Outlook, they are labeled Accept, Tentative, and Decline.
Responding to an RSVP event invitation
When you receive an emailed event invitation that requests an RSVP:
- Open the email invitation and click or tap the Click here to RSVP link. It takes you to the event’s page on the group website. You will need to log in to your Groups.io account if you are not already logged in.
Gmail and Outlook users: You will see response buttons in the email message (Yes, No, Maybe in Gmail; Accept, Tentative, and Decline in Outlook). You can use those buttons to respond to the invitation without going to the group website. - On the RSVP event’s page:
- Provide any information that the event creator requested.
- If the event creator is allowing attendees to bring guests, and you plan to attend the event, select the number of guests you are bringing from the list above the Will Attend button. (That list will not be present if attendees are not allowed to bring guests.)
- Click or tap the button that applies to your response: Will Attend, Will Not Attend, or Not Sure.
Note: If the Not Sure button is not shown, it means the event’s creator has limited the number of attendees.
You will receive an email notification confirming your response.
Note: If the event’s creator has limited the number of attendees, and:
- The event is full when you respond that you will attend: You are added to a wait list. A notification, with your position on the wait list, will be displayed at the top of the page. If your position on the wait list changes, you will receive an email notification. Be aware that if you change your RSVP to Will Not Attend and later change it back to Will Attend, you will be put at the end of the wait list.
- You were accepted as an attendee, but you later update your RSVP to increase the number of guests you are bringing and you get a notification that the event is full: You will be added to the wait list, but you will be at the end of the list.
Viewing RSVP event responses and contacting respondents
All group members can see who has responded to an RSVP event:
- Display the group’s calendar.
Desktop browser: On the group’s website, in the left menu, click Calendar.
Mobile device: At the bottom of a group page, tap the More icon, then tap Calendar on the More menu.
- Find the RSVP event, click or tap its name to open its popup summary, then click or tap the See more details button.
- On the event’s details page, click or tap the Responses button. On the Responses page, you can select a gallery (grid) view or a list view using the icons at the right above the list of respondents. You can also sort the responses by name, response type, or date.
Event creators, as well as group owners and moderators, can email members who have responded to the RSVP event:
- Follow steps 1 through 3 above.
- On the Responses page, click or tap the Actions button at the bottom, and select the desired Email All option.
- On the resulting page, compose your message, and click or tap the Send To Members button.
Changing someone’s response
Event creators, as well as group owners and moderators, can change other members’ responses to an RSVP event:
- Display the group’s calendar.
Desktop browser: On the group’s website, in the left menu, click Calendar.
Mobile device: At the bottom of a group page, tap the More icon, then tap Calendar on the More menu.
- Find the RSVP event, click or tap its name to open its popup summary, then click or tap the See more details button.
- On the event’s details page, click or tap the Responses button.
- On the Responses page, click or tap the List View icon above the list of respondents.
Note: You cannot change responses from the gallery view. - Select the checkbox next to the respondent's name. You can select more than one respondent if you want to change all of them to the same response.
- Click or tap the Actions button at the bottom of the page and select Change RSVP.
- In the Change RSVP popup, select the response you want to change to, then click or tap the Change button.
Creating name tags for event attendees
- Display the group’s calendar.
Desktop browser: On the group’s website, in the left menu, click Calendar.
Mobile device: At the bottom of a group page, tap the More icon, then tap Calendar on the More menu.
- Find the RSVP event, click or tap its name to open its popup summary, then click or tap the See more details button.
- On the event’s details page, click or tap the Responses button.
- On the Responses page, click or tap the Actions button at the bottom, then select Create Name Tags.
- In the Create Name Tags popup, select the desired Avery template for name tags, then click or tap Create. Groups.io generates a PDF file of event attendees that is formatted for that template. The name tags contain the display names and photos (if provided) from the attendees’ group profiles.
Exporting a list of event attendees
- Display the group’s calendar.
Desktop browser: On the group’s website, in the left menu, click Calendar.
Mobile device: At the bottom of a group page, tap the More icon, then tap Calendar on the More menu.
- Find the RSVP event, click or tap its name to open its popup summary, then click or tap the See more details button.
- On the event’s details page, click or tap the Responses button.
- On the Responses page, click or tap the Actions button at the bottom, then select Export Responses. A list of members who responded is exported to a comma-separated values (CSV) file. You can open or save the file and then sort it to obtain a list of members who responded that they will attend.
Locking or unlocking RSVP events
Locking an RSVP event prevents members from changing their responses to that event.
To lock an RSVP event:
- Display the group’s calendar.
Desktop browser: On the group’s website, in the left menu, click Calendar.
Mobile device: At the bottom of a group page, tap the More icon, then tap Calendar on the More menu.
- Find the RSVP event, click or tap its name to open its popup summary, then click or tap the See more details button.
- Scroll to the bottom of the event’s details page and click or tap the Lock Event button. A statement that the event has been locked is added below the event’s description on its page, and members will not be able to change their RSVP responses nor will they be able to add a response if they have not already responded.
To unlock an RSVP event, follow the steps above, but in step 3, click or tap the Unlock Event button.
Note: Group members do not receive notifications when RSVP events are locked or unlocked.
Cancelling an RSVP event
To cancel an RSVP event and notify the respondents about the cancellation:
- Display the group’s calendar.
Desktop browser: On the group’s website, in the left menu, click Calendar.
Mobile device: At the bottom of a group page, tap the More icon, then tap Calendar on the More menu.
- Find the RSVP event, click or tap its name to open its popup summary, then click or tap the See more details button.
- Click or tap the Cancel Event button at the bottom right of the details page. A message composition page appears.
- Enter an appropriate subject line and a message explaining the cancellation.
- If you want a copy of the cancellation message to go to yourself and/or the moderators of the group, select the appropriate Bcc: checkbox.
- Click or tap the Cancel Event And Email RSVPs button. Your cancellation message is sent to the event’s respondents. The event remains on the calendar (and is colored gray in Month, Week, and Day view). The event’s details page contains a statement that the event has been cancelled, and the response buttons are not active.
Deleting an RSVP event
Deleting an individual chat message
Restriction: This feature is available only in Premium groups, Enterprise groups, and legacy Free groups.
Groups.io provides a Chats feature that group members can use to create and participate in interactive chats on a group’s website in real time. Be aware that:
- Group owners determine whether the Chats feature is available in their groups and, if it is, who can create new chats: all members or only owners and moderators.
- When someone creates a chat, Groups.io sends an email notification to group members. After that, ongoing activity in the chat does not generate additional email notifications. Members must log in to Groups.io to participate in and monitor chats.
- All group members can participate in chats. Groups.io does not provide a “private” chat option that allows chat creators to restrict chats to subsets of group members.
- In some web browsers, the Chat page does not display activity in real time. To see new chat content, members might need to refresh the Chat page periodically.
- The Chat page does not display any indication that someone is composing a response. Participants do not see that chat activity is occurring until someone actually posts their response.
Restriction: This feature is available only in Premium groups, Enterprise groups, and legacy Free groups.
To create a new chat:
- Desktop browser: In the left menu on the group’s website, select Chats.
Mobile device: Go to the group and tap the Chats icon at the bottom of a page.
Note: If you do not see a Chats menu item or icon, then the Chats feature is disabled for that group, or the group is a Free group that was created after August 24, 2020. - On the Chats page, click or tap the New Chat button at the top.
Note: If you do not see a New Chat button, the group is set to allow only owners and moderators to create chats. - On the New Chat page, compose your chat:
- Enter a concise but descriptive subject line that identifies the chat.
- In the text editor box, enter a description of or reason for the chat.
- Make sure the Send an announcement to the group checkbox is selected (it is selected by default).
- Click or tap the Create Chat button at the bottom of the New Chat page. Groups.io sends an email notification about the chat to group members. The subject line of the email notification contains the #chat-notice system hashtag.
Restriction: This feature is available only in Premium groups, Enterprise groups, and legacy Free groups.
Note: Only chat creators, group owners, or group moderators who have the appropriate permissions can edit chats.
To update the subject line or description (or both) of an open or closed chat:
- On the Chats page, click or tap the down arrow next to the chat’s posting date and select Edit Chat from the dropdown menu.
- Make your changes to the subject or description (or both).
- Click or tap the Update Chat button at the bottom of the page.
Restriction: This feature is available only in Premium groups, Enterprise groups, and legacy Free groups.
When you receive an email notification about a new chat, open the email message and click or tap the View/Join This Chat link to go to the chat’s page on the group website.
Note:
- If you are not logged in to your Groups.io account, you will need to log in before the chat’s page is displayed.
- If you have not set a username and/or display name in your Groups.io account, the Your Identity popup appears and prompts you to enter the missing element(s). This information is optional, but having a username allows other members to tag (@mention) you in chats, and the display name identifies you by something other than your email address. If desired, complete the popup and click or tap Update Identity (if you prefer not to add a username or display name, just click or tap Cancel). Then you will see the chat’s page.
Note: The username you enter in the popup is added to your overall account profile. The display name you enter in the popup is added to your profile for this individual group; if the chat is in a subgroup, the display name is added to your profile for the main group. - Do not reply to the notification email message. You cannot participate in group chats by email.
The chat’s page at the group’s website shows a preview of the chat activity so far. To participate in the chat, click or tap the Join Chat button on the page.
Tip: Another way to join a chat is to go to the Chats page on the group’s website or in the mobile app and select the chat you want to join.
Desktop browser: In the left menu on a group’s website, select Chats.
Mobile device: Go to the group and tap the Chats icon at the bottom of a page.
Restriction: This feature is available only in Premium groups, Enterprise groups, and legacy Free groups.
After you join a chat, you can contribute to it by entering text in the text field at the bottom of the page and clicking or tapping the Send (up arrow) button to the right of the text field.
When you are entering a chat message, you can type @ to tag (also known as @mention) group members in that chat who have set up a username in their Groups.io account. (The username is part of your Groups.io account profile.)
If you want to include the content of another chat message in yours, click or tap and hold (“long press”) in that message and select the curved arrow icon from the popup. That chat message is duplicated above the text field. After you enter your message in the text field and send it to the chat, the content of the message you included appears above your message.
You can upload photos or videos to the chat by clicking or tapping the plus (+) button to the left of the text field and selecting Upload Photos or Upload Videos from the popup menu. On a mobile device, you can also tap the camera icon to the right of the text field to take a photo or video and upload it to the chat immediately.
To react to a chat message with an icon (also known as sending a Tapback), click or tap and hold (“long press”) in the chat message until a list of icons appears, then select the desired icon from the list.
Tip: In a message that has Tapbacks, you can click or tap the icons to display a list of the members who sent the Tapbacks.
To see a list of group members who are participating in the chat, click or tap the plus (+) button and select Chat Members from the popup menu.
Tip: You can receive web/app notifications for new messages posted to a chat by enabling them in the Member notification settings on your Subscription page for the group.
Restriction: This feature is available only in Premium groups, Enterprise groups, and legacy Free groups.
If you no longer want to participate in a chat, you can leave it by clicking or tapping the plus (+) button to the left of the text field and selecting Leave Chat from the popup menu.
Restriction: This feature is available only in Premium groups, Enterprise groups, and legacy Free groups.
You can delete a chat message that you posted by clicking or tapping and holding (long pressing) in that message and selecting the trash can icon from the popup.
Restriction: This feature is available only in Premium groups, Enterprise groups, and legacy Free groups.
Closing a chat
- Display the group’s Chats page.
Desktop browser: In the left menu on the group’s website, select Chats.
Mobile device: Go to the group and tap the Chats icon at the bottom of a page. - On the Chats page, locate the chat you want to close and click or tap the down arrow next to its posting date.
- From the dropdown menu, select Close Chat. The chat is removed from the list of open chats. The chat is still available to view on the group’s website, but members cannot contribute to it.
Tip: Another way you can close a chat is to select Edit Chat (instead of Close Chat) from the dropdown menu next to the chat’s posting date, and then, on the Edit Chat page, click or tap the Close Chat button. If desired, you can update the subject or description of the chat before you close it from this page.
Reopening a chat
To reopen a closed chat so members can contribute to it again:
- Display the group’s Chats page.
Desktop browser: In the left menu on the group’s website, select Chats.
Mobile device: Go to the group and tap the Chats icon at the bottom of a page. - Click or tap the Open Chats link at the top, and select Closed Chats from the dropdown list.
- Locate the closed chat that you want to reopen and click or tap the down arrow next to its posting date.
- From the dropdown menu, select Reopen Chat.
Tip: Another way you can reopen a chat is to select Edit Chat (instead of Reopen Chat) from the dropdown menu next to the chat’s posting date, and then, on the next page, click or tap the Reopen Chat button. If desired, you can update the subject or description of the chat before you reopen it from this page.
Restriction: This feature is available only in Premium groups, Enterprise groups, and legacy Free groups.
When you go to the Chats page on a group’s website, the currently open chats are listed by default.
To see a list of chats that are closed but still available on the group’s website:
- Display the group’s Chats page.
Desktop browser: In the left menu on the group’s website, select Chats.
Mobile device: Go to the group and tap the Chats icon at the bottom of a page. - Click or tap the Open Chats link at the top, and select Closed Chats from the dropdown list.
To view the contents of an open or closed chat on its own page, click or tap the chat’s subject link.
Restriction: This feature is available only in Premium groups, Enterprise groups, and legacy Free groups.
To delete a chat:
- Display the group’s Chats page.
Desktop browser: In the left menu on the group’s website, select Chats.
Mobile device: Go to the group and tap the Chats icon at the bottom of a page. - On the Chats page, look for the open or closed chat you want to delete and click or tap the down arrow next to its posting date.
- From the dropdown menu, select Delete Chat. In the Verify Delete confirmation popup, click or tap Yes. The chat is deleted from the group.
Tip: Another way you can delete a chat is to select Edit Chat from the dropdown menu next to the chat’s posting date and then, on the Edit Chat page, click or tap the Delete Chat button at the bottom.
Restriction: This feature is available only in Premium groups, Enterprise groups, and legacy Free groups.
Groups.io provides a Databases feature that members can use to view and create databases on a group’s website. Example uses for databases include (but are not limited to):
- A membership roster for an organization, club, or community group
- A list of local suppliers, such as craft suppliers for a crafting group
- A list of projects and members who are assigned to them
- A list of links to websites that are of interest to group members
Note: Group owners determine whether the Databases feature is available in their groups and, if it is, who can view and create databases: all members or only owners and moderators.
Restriction: This feature is available only in Premium groups, Enterprise groups, and legacy Free groups.
To view a database:
- Desktop browser: On the group’s website, in the left menu, click Databases.
Mobile device: At the bottom of a group page, tap the More icon and then tap Databases on the More menu.
Note: If you do not see a Databases entry, then the Databases feature is disabled for that group, members are not allowed to view database tables, or the group is a Free group that was created after August 24, 2020. - On the Databases page, click or tap a database’s link to display it on its own page.
On a database’ page, you can:
- Click or tap a column’s name to sort the database by that column. Clicking or tapping the column heading a second time reverses the sort order.
- Hide any columns that you do not want to see on the page. At the top of the page, click or tap the Visible button, which displays a list of the column names. Clear the checkboxes next to the names of the columns you want to hide.
- Change the number of rows you see on the page in the display preferences for your Groups.io account. See Setting the number of items to show on group web pages.
Restriction: This feature is available only in Premium groups, Enterprise groups, and legacy Free groups.
To create a database:
- Display the group’s Database page.
Desktop browser: On the group’s website, in the left menu, click Databases.
Mobile device: At the bottom of a group page, tap the More icon and then tap Databases on the More menu. - On the Databases page, click or tap the New Database button at the top.
Note: If you do not see this button, the group does not allow members to create databases. - On the Add Database page, specify the database’s properties and add columns.
- Go to the bottom of the page and click or tap the Create Database button. The database is created and added to the Databases page. Now you (and group members, if they are allowed) can add rows to the database.
Tip: If you have a JSON file that is formatted for a database table, you can import that file to create the database. See Importing JSON or CSV files.
Related help topics
Restriction: This feature is available only in Premium groups, Enterprise groups, and legacy Free groups.
To edit a database:
- Display the Database you want to edit.
- At the top of the page, click or tap the Edit Table Properties button.
Note: If you do not see this button, the group does not allow members to edit databases. - On the Modify Database page, edit the properties and columns as desired.
Tip: To delete a column, click or tap the X at the far right in the column’s panel heading. - Scroll to the bottom of the Modify Database page and click or tap the Update button.
Related help topics
Restriction: This feature is available only in Premium groups, Enterprise groups, and legacy Free groups.
About JSON and CSV files
You can create a Groups.io database by importing an existing file that is one of these types:
- JSON (JavaScript Object Notation format)
- CSV (comma-separated values format)
A JSON file can contain all the properties of a database (including description, permissions, and so on). A CSV file can contain only table columns and rows.
Note:
- If the group does not allow members to create databases, you will not be able to import JSON or CSV files.
- Explaining how to create JSON and CSV files is outside the scope of the Groups.io Help Center.
Importing a JSON file
- Display the group’s Databases page.
- Click or tap the Import JSON button at the top.
- In the Import JSON popup, use the Browse button to navigate to and select the JSON file that you want to import, then click or tap the Import button.
Importing a CSV file
! Important: Before you import a CSV file, you must first create a database and add columns that match the columns in the CSV file. Groups.io cannot import a CSV file to a database unless the corresponding columns already exist in that database.
Tip: The CSV file can contain a header line with column names that match the columns in the database you created, but a header line is not required.
To import a CSV file:
- Display the database containing the columns that are in the CSV file.
- On that database’s page, click or tap the Import Rows button.
- In the Import CSV popup:
- Use the Browse button to navigate to and select the CSV file that you want to import.
- If the first line of the CSV file contains the column names, select the File Has Header Line checkbox.
- Click or tap the Import button.
Restriction: This feature is available only in Premium groups, Enterprise groups, and legacy Free groups.
Related help topics
Adding columns
On the Add Database (or Modify Database) page, each column has its own panel. For a new database, three columns are displayed by default. You can add more columns (one at a time) by clicking or tapping the Add Column button at the bottom of the page.
Changing column order
To change the order of columns in the database, click or tap the up or down arrow at the far right on the column’s panel heading to move the column up or down on the page.
Deleting columns
To delete a column, click or tap the X next to the down arrow at the far right in the column’s panel heading.
Column properties
- Name
Enter the name that will appear in the column heading at the top of the table.
- Type
From the list, select the type of content the column will contain. See Table column types below.
- Description (optional)
In this field, you can enter a description of the column that will appear under that column’s field on each row’s individual page when the row is viewed or edited. You could use this description to contain brief instructions for completing entries in this column.
- Display Width
If desired, enter a specific width for the column. This value specifies the number of pixels—not characters. Leave the default value of 0 if you want the column to adjust automatically (wrapping the content, if needed), along with other columns, to fit the width of the table on the page.
Tip: In general, leaving the display width set to 0 for all columns in the table results in the best table appearance in different browsers and on different devices.
- Default Hidden
Select this checkbox if you want the column to be hidden by default when members view the table. When they are viewing the table, members can use the Visible button at the bottom of the table’s page (see Viewing databases) to display the column if desired.
- Color
If you want to assign a color to the column (for example, to help distinguish it on the page), click or tap this box to display a color palette, and select the color you want to use.
- Answer Required
Select this checkbox if you want to require members to provide an entry in this column when they add a new row to the table.
Column types
From the Type list on a column’s panel, select the type of content the column will contain:
- Single Line Text
Adds a column entry for members to enter a single line of information.
- Paragraph
Adds a column entry for members to enter more text than a single line. This type allows members to add blank lines in the column entry by pressing the Enter key.
- HTML Paragraph
Adds a column entry that allows HTML formatting.
- Checkbox
Displays a checkbox—and only a checkbox—in the column entry. With this column type, you might use the column’s Description field to explain why someone would select this checkbox when they are adding a table row.
- Number
Adds a column entry for members to enter a number.
- Single Select, Multiple Choice
Displays a dropdown list in the column entry. Members must select one item from the list.
When you select this type, Choices boxes appear at the end of this column’s panel, under the Answer Required checkbox. In the boxes, enter the items that members can choose from. Click or tap the Add Choice button if you need to add more items.
- Multiple Select, Single Choice
Displays a list of items with checkboxes in the column entry. This type allows members to select more than one item.
When you select this type, Choices boxes appear at the end of this column’s panel, under the Answer Required checkbox. In the boxes, enter the items that members can choose from. Click or tap the Add Choice button if you need to add more items.
- Date
Adds a popup calendar in the column entry that members can use to select a date. Alternatively, members can enter a date directly.
- Time
Adds a dropdown list in the column entry that contains 30-minute time increments. Members can select a time from the list or enter a time directly.
- Address
Adds a column entry that contains Address Line 1, Address Line 2, City, State/Province/Region, and Postal/ZIP Code fields plus a country selection list.
When you select this type, a dropdown list to select a country appears at the end of this column’s panel, under the Answer Required checkbox. You can select a country to use as the default for entries in this column (members adding rows will be able to change the country if desired) or leave the country unselected.
Tip: This column type is of limited use when sorting tables because the sort uses the characters of Address Line 1. If you want to be able to sort the table by individual address elements such as city, state, ZIP Code, and so on, you should consider creating a separate Single Line Text column for each address element.
Note:
- In Premium and Enterprise groups, the Address column type enables a feature that allows the table to be displayed in a map view using Google Maps. Map view is limited to tables of up to 1,000 rows (for system performance reasons).
- In legacy Free groups, each address in an Address column will have a [Map] link that members can click to open a map for that location in a separate tab or window.
- Link
Adds a column entry that members can use to enter a web page URL (which will become a clickable link), a name for the link, and a description of the link.
- Image
Adds a column entry that members can use to include an image.
Note: The group’s owner might set a maximum size for images in databases, in which case, images that are uploaded to the table might get resized.
- Email Address
Adds a column entry that members can use to include an email address. Entries in this column will become clickable mailto: links that will bring up a new message window in users’ email applications.
- GitHub Identity
Adds a column entry that members can use to authenticate and link their GitHub account, displaying their GitHub profile information within Groups.io. You can use this column type for developer communities where a GitHub presence is relevant.
Tips:
- Consider making this entry optional unless the GitHub account is essential.
- You can combine this column with other columns for comprehensive developer profiles.
- Be transparent to group members about what GitHub data is collected and displayed. Inform your group members that:
- Connecting to GitHub is voluntary (unless you have made the column required).
- Only public GitHub profile information is accessed by Groups.io.
- They can disconnect from GitHub at any time.
- No actions are performed on their GitHub account by Groups.io.
- Their GitHub username might be visible to other group members, depending on permissions specified in the database table or their group profile.
For more information, see GitHub support in Groups.io.
Restriction: This feature is available only in Premium groups, Enterprise groups, and legacy Free groups.
Related help topics
Adding rows
- Display the database you want to add rows to.
- At the top of the database’s page, click or tap the Add Row button.
Note: If the Add Row button is not available, the database’s creator has not allowed members to add rows to the database. - On the Add Row page, complete the fields.
- Click or tap the Save Row button at the bottom of the page.
Tip: Another way to add rows to a database is to import a CSV file containing rows and columns that match the database’s columns. See Importing a CSV file.
Editing rows
- Display the database containing the row you want to edit.
- On the on the database’s page, select the checkbox next to the row to be edited.
- Go to the bottom of the page and click or tap the View/Edit Row button.
- On the Update Row page, make your changes, then click or tap the Update button at the bottom of the page.
Deleting rows
- Display the database containing the row or rows you want to delete.
- On the database’s page, select the checkbox next to the row or rows to be deleted.
- Go to the bottom of the page and click or tap the Delete Rows button.
- When the Verify Delete confirmation popup appears, click or tap Yes.
Tip: You can also delete rows using the Delete button at the bottom of the Update Row page (see Editing Rows above).
Restriction: This feature is available only in Premium groups, Enterprise groups, and legacy Free groups.
On the Add Database or Modify Database page, you can specify or update these properties of a database table:
- Name
In this field, enter the name of the table. This name will become the link on the Databases page that members click or tap to view the table.
- Short Description
In this field, enter a short description that will appear under the database’s name on the Databases page.
- Description
In this field, enter a more detailed description that will appear at the top of the database’s page when members are viewing the database.
- Permissions specifying who can view and edit the database, add rows, and edit rows
In each list on the Permissions panel—View Database, Edit Database, Add Rows, Edit Rows—select who can perform the associated action for that table. The options are all group members or only group moderators plus the database owner.
You can also change the database owner on this panel by selecting a different person from the Database Owner list.
- Defaults for hiding system-provided columns
In this panel, you can specify whether the system-provided ID and Updated columns in the database are hidden by default when members view the database. Select the checkbox for the column you want to hide (you can select both). Members can later use the Visible button at the bottom of the database’s page (see Viewing databases) to display those columns if desired.
Note:
- The ID column contains sequential numbers that Groups.io automatically assigns to table rows to uniquely identify them. ID numbers are permanently assigned to rows and do not change when other rows are added or deleted.
- The Updated column contains the date when the associated row was last updated.
- The ID and Updated columns cannot be edited.
! Important: If you are modifying a database, make sure you scroll to the bottom of the page and click or tap the Update button to apply your changes.
Related help topics
Restriction: This feature is available only in Premium groups, Enterprise groups, and legacy Free groups.
Note: Only the database’s current owner, a moderator who has the appropriate permissions, or a group owner can change a database’s owner.
To change a database’s owner:
- Display the database.
- At the top of the database’s page, click or tap the Edit Table Properties button.
- On the Modify Database page, in the Permissions panel, click or tap the Database Owner dropdown list and select the member who is to be the table’s new owner.
- Scroll to the bottom of the page and click or tap the Update button.
Restriction: This feature is available only in Premium groups, Enterprise groups, and legacy Free groups.
You can export a database table to a JSON file or a CSV file:
- Display the database you want to export.
- On the database’s page, click or tap the Export Table button at the top of the page.
Note: On a mobile device, you might need to display the page in landscape mode to see the button. - In the Export Table popup, click or tap the JSON Format button or the CSV Format button.
- Save the resulting file.
Tip: An exported JSON file contains all the properties of the table specified in the group, including description, permissions, and so on. An exported CSV file contains only the table columns and rows. If you want to preserve a copy of the table along with all of its group properties (for example, so you can later import it back into a group), export the table to a JSON file.
Restriction: This feature is available only in Premium groups, Enterprise groups, and legacy Free groups.
To delete a database:
- Display the database you want to delete.
- On the database’s page, click or tap the Edit Table Properties button at the top.
Note: If you do not see this button, the group does not allow members to delete databases. - On the Modify Database page, scroll to the bottom and click or tap the Delete Table button.
- In the Verify Delete confirmation popup, click or tap Yes.
Uploading files and folders or adding links
Updating files, folders, and links
Moving files, folders, and links
Deleting files, folders, and links
Reporting files or folders to moderators or Groups.io support
Restriction: This feature is available only in Premium groups, Enterprise groups, and legacy Free groups.
Groups.io provides a Files feature that members can use to upload and view files on a group’s website. Files can be organized in folders.
A group’s Files section can also contain links to files that are stored in external locations such as Dropbox and Google Drive as well as links to other websites.
Note:
- Group owners determine whether the Files feature is available in their groups and, if it is, who can view and upload files: all members or only owners and moderators.
- The size limit for an uploaded file is 2GB.
Restriction: This feature is available only in Premium groups, Enterprise groups, and legacy Free groups.
To view a file:
-
Desktop browser: On the group’s website, in the left menu, click Files.
Mobile device: At the bottom of a group page, tap the More icon and then tap Files on the More menu.
Note: If you do not see a Files entry on the menu, then the Files feature is disabled for that group, members are not allowed to view files, or the group is a Free group that was created after August 24, 2020.
- On the Files page, click or tap a file’s link to open the file. If the files are organized in folders, click or tap a folder’s link to open it and see the files it contains.
Tips:
- On the Files page, you can click or tap a column’s heading to sort the list of files and folders by that heading. Clicking or tapping the column heading a second time reverses the sort order.
- You can change the number of files and folders you see on a page in the display preferences for your Groups.io account. See Setting the number of items to show on group web pages.
- You can use the Search field and icon at the upper right of the Files page to search for files. The search engine finds keywords in file names and descriptions, and it also searches the contents of plain text and PDF files only. It does not search the contents of any other types of files (such as Microsoft Word documents).
Related help topic
Restriction: This feature is available only in Premium groups, Enterprise groups, and legacy Free groups.
To upload a file or a folder to the Files section, or to add a link to an external file or website:
- Go to the Files page.
Desktop browser: On the group’s website, in the left menu, click Files.
Mobile device: At the bottom of a group page, tap the More icon and then tap Files on the More menu.
Note: If you do not see a Files entry on the menu, then the Files feature is disabled for that group, members are not allowed to view files, or the group is a Free group that was created after August 24, 2020.
- On the Files page, click or tap the New/Upload button at the top and, from the dropdown menu, select the desired option:
- New Folder
Create a new folder to contain files.
Note: If you do not see this option, the group does not allow members to create new folders.
- Upload File
Upload a file or files. If you are uploading more than one file, the description you enter will be applied to each file.
- Upload Folder
Upload an entire folder and the files it contains (including any subfolders and their files). The folder structure will be preserved in the group.
Note: If you do not see this option, the group does not allow members to upload folders.
- Link to Google Drive
Add a link to a file that is stored on Google Drive. Use the function in Google Drive to get a shareable link to the file, and then copy and paste that link into the Google Drive URL field in the Link To A File On Google Drive popup.
- Link to Dropbox
Add a link to a file that is stored in Dropbox. Use the function in Dropbox to get a shareable link to the file, and then copy and paste that link into the Dropbox URL field in the Link To A File On Dropbox popup.
- Link to Box
Add a link to a file that is stored in Box. Use the function in Box to get a shareable link to the file, and then copy and paste that link into the Box URL field in the Link To A File On Box popup.
- Link to Microsoft OneDrive
Add a link to a file that is stored on OneDrive. Use the function in OneDrive to get a shareable link to the file, and then copy and paste that link into the OneDrive URL field in the Link To A File On OneDrive popup.
- Generic Link
Add a link to a file that is hosted by another service, or even a link to a website or web page rather than to a specific file.
- New Folder
- In the popup that appears, complete the fields and then click or tap the Add button.
If you want to send a system-generated email notification about the file, folder, or link to group members, select the Notify Members checkbox before you click or tap Add. The email notification will contain a link to the item that you added and will have the #file-notice system hashtag. (If you are uploading multiple files, only one email notice is sent, with a separate link for each file.)
Note:
- If the New/Upload button is not available, one of these situations applies:
- The group has reached its storage limit.
- The folder’s owner does not allow other members to upload files to the folder.
- Members are not allowed to upload files to the group.
- The size limit for an uploaded file is 2GB.
Restriction: This feature is available only in Premium groups, Enterprise groups, and legacy Free groups.
To create a folder in the Files section:
- Go to the Files page.
Desktop browser: On the group’s website, in the left menu, click Files.
Mobile device: At the bottom of a group page, tap the More icon and then tap Files on the More menu.
Note: If you do not see a Files entry on the menu, then the Files feature is disabled for that group, members are not allowed to view files, or the group is a Free group that was created after August 24, 2020.
- On the Files page, click or tap the New/Upload button at the top.
- From the dropdown menu, select New Folder.
Note: If you do not see this option, the group does not allow members to create new folders. - In the New Folder popup:
- Enter a name for and description of the folder.
- From the Upload Privileges list, select the applicable option based on whether you want other members or only yourself to be able to add files to the folder.
- If you want to send a system-generated email notice about the new folder to group members, select the Notify Members checkbox. The email notification will contain a link to the folder and will have the #file-notice system hashtag.
- Click or tap the Add button.
Restriction: This feature is available only in Premium groups, Enterprise groups, and legacy Free groups.
It is not possible to edit the content of existing files in the Files section of a group’s website, but you can upload a new version of a file to replace the existing version. You can also edit the name and description of an existing file or folder, and you can update the URL and description of a linked file or website.
To make any of these changes:
- Go to the Files page.
Desktop browser: On the group’s website, in the left menu, click Files.
Mobile device: At the bottom of a group page, tap the More icon and then tap Files on the More menu.
Note: If you do not see a Files entry on the menu, then the Files feature is disabled for that group, members are not allowed to view files, or the group is a Free group that was created after August 24, 2020.
- Locate the file, folder, or link you want to modify, and click or tap the Update icon (pencil in a square) next to it.
- In the Update popup, make your desired changes. If you want to notify group members about the update, select the Notify Members checkbox. The email notice will contain the #file-notice system hashtag.
- Click or tap the Update button.
Note: The date in the Updated column on the Files page changes only in these cases:
- A new version of a file is uploaded.
- The description of a file, link, or folder is changed.
- For a link: The URL is changed.
Restriction: This feature is available only in Premium groups, Enterprise groups, and legacy Free groups.
To move a file, folder, or link in the Files section:
- Go to the Files page.
Desktop browser: On the group’s website, in the left menu, click Files.
Mobile device: At the bottom of a group page, tap the More icon and then tap Files on the More menu.
Note: If you do not see a Files entry on the menu, then the Files feature is disabled for that group, members are not allowed to view files, or the group is a Free group that was created after August 24, 2020.
- Locate the item you want to move, and click or tap the Move icon (folder with arrow) next to it.
- In the Move popup, select the folder you want to move the item to. The item is moved to the selected folder.
Note: If you want to notify group members about the move, select the Notify Members checkbox before you select the folder. The email notice will contain the #file-notice system hashtag.
Restriction: This feature is available only in Premium groups, Enterprise groups, and legacy Free groups.
To delete a file, folder, or link from the Files section:
- Go to the Files page.
Desktop browser: On the group’s website, in the left menu, click Files.
Mobile device: At the bottom of a group page, tap the More icon and then tap Files on the More menu.
Note: If you do not see a Files entry on the menu, then the Files feature is disabled for that group, members are not allowed to view files, or the group is a Free group that was created after August 24, 2020.
- Locate the item you want to delete, and click or tap the Delete icon (trash can) next to it.
- In the Verify Delete confirmation popup, click or tap Yes.
Note: If you want to notify group members about the deletion, select the Notify Members checkbox. The email notice will contain the #file-notice system hashtag.
Restriction: This feature is available only in Premium groups, Enterprise groups, and legacy Free groups.
To report a file, folder, or link to the group’s moderators (for example, because you think it is not appropriate for the group) or to Groups.io Support (for example, because you think it violates the Groups.io Terms of Service):
- On the group’s website or in the the mobile app, locate the item you want to report, and click or tap the Report File icon (flag) next to it.
- In the Report File popup
- Enter the reason you are reporting the file or folder.
- Select Report to Moderators or Report to Groups.io Support, as applicable.
- Click or tap Report. An email message with the subject “Content flagged as inappropriate” is sent to the group moderators or to Groups.io Support. Your email address is included in that message.
Note: The member who uploaded the item you reported is not notified about the complaint. It is up to the group’s moderators or Groups.io Support to determine how to act on your complaint.
About the Emailed Photos album
Reporting photos to moderators or Groups.io support
Restriction: This feature is available only in Premium groups, Enterprise groups, and legacy Free groups.
Groups.io provides a Photos feature that members can use to upload and view image files on a group’s website. Images can be organized in albums.
Note:
- Group owners determine whether the Photos feature is available in their groups and, if it is, who can view and upload image files: all members or only owners and moderators.
- The size limit for an uploaded image file is:
- 100MB in legacy Free groups
- 1GB in Premium and Enterprise groups
Images that are included in or attached to group messages are automatically stored in a system-created album named Emailed Photos. That album is always listed first on the Photo Albums page. Group members cannot upload images to the Emailed Photos album manually. Only group owners and moderators can delete images in that album.
Note:
- Only images that are larger than 100x100 pixels are displayed in the Emailed Photos album.
- Emailed Photos is not the same as albums that are created by group members. The Emailed Photos album actually is a collection of pointers to photos that have been attached to messages sent to the group. If a message with a photo attached is edited and the photo is deleted, that photo disappears from the Emailed Photos album.
Restriction: This feature is available only in Premium groups, Enterprise groups, and legacy Free groups.
To view a photo:
- Desktop browser: On the group’s website, in the left menu, click Photos.
Mobile device: At the bottom of a group page, tap the More icon and then tap Photos on the More menu.
Note: If you do not see a Photos entry on the menu, then the Photos feature is disabled for that group, members are not allowed to view photos, or the group is a Free group that was created after August 24, 2020. - On the Photo Albums page, click or tap a album’s thumbnail to open the album.
- On the album’s page, click or tap a photo’s thumbnail to view the photo.
Tips:
- You can change the sort order of albums or photos by clicking or tapping the Sort By button at the top right of the page and selecting the desired sort option.
Note: On the Photo Albums page, the Emailed Photos album is always listed first. - You can change the number of albums and photos you see on a page in the display preferences for your Groups.io account. See Setting the number of items to show on group web pages.
- You can use the Search field and icon at the upper right of the Photos page to search for photos. The search engine searches across all photo albums in the group (except the Emailed Photos album) for keywords in photo file names and descriptions.
Related help topics
Restriction: This feature is available only in Premium groups, Enterprise groups, and legacy Free groups.
To create a photo album:
- Go to the Photo Albums page.
Desktop browser: On the group’s website, in the left menu, click Photos.
Mobile device: At the bottom of a group page, tap the More icon and then tap Photos on the More menu.Note: If you do not see a Photos entry on the menu, then the Photos feature is disabled for that group, members are not allowed to view files, or the group is a Free group that was created after August 24, 2020.
- On the Photo Albums page, click or tap the New Album button.
Note: If you do not see this option, the group does not allow members to create new albums. - In the New Album popup:
- Enter a title for and description of the album.
- From the Upload Privileges list, select the applicable option based on whether you want other members or only yourself to be able to add photos to the album.
- If you want to send a system-generated email notification about the album to group members, select the Notify Members checkbox. The email notification will contain a link to the album and will have the #photo-notice system hashtag.
- Click or tap the Create button.
Note: If the album description is too long, some of it will not be visible on the album’s main page. Depending on the font size, up to about five lines of text will fit. When you are creating an album, you should verify that the entire description is visible on the album’s main page.
Restriction: This feature is available only in Premium groups, Enterprise groups, and legacy Free groups.
Group members can edit their own albums; owners and moderators can edit any members’ albums. The edits you can make are changing the owner, changing the title or description, and changing who has access.
Note: If the album description is too long, some of it will not be visible on the album’s main page. Depending on the font size, up to about five lines of text will fit. When you are editing an album’s description, you should verify that the entire description is visible on the album’s main page.
To edit an album:
- Open the album you want to edit.
- On the album’s page, click or tap the Edit Album button.
- On the Edit page, make your desired changes.
- Click or tap the Update button at the bottom of the page.
- In the Verify Update popup:
- If you want to send a system-generated email notification about the updated album to group members, select the Notify Members checkbox. The email notification will contain a link to the album and will have the #photo-notice system hashtag.
- Click or tap Yes to save the updated album (and send an email to members if you selected the Notify Members checkbox).
Restriction: This feature is available only in Premium groups, Enterprise groups, and legacy Free groups.
To add a photo or photos to an album:
- Go to the Photo Albums page.
Desktop browser: On the group’s website, in the left menu, click Photos.
Mobile device: At the bottom of a group page, tap the More icon and then tap Photos on the More menu.Note: If you do not see a Photos entry on the menu, then the Photos feature is disabled for that group, members are not allowed to view files, or the group is a Free group that was created after August 24, 2020.
- On the Photo Albums page, click or tap the thumbnail of the album you want to add photos to.
- On that album’s page, click or tap the Add Photos button.
- In the Upload Photos popup:
- Drag and drop an image file, or multiple files, to the popup, or click or tap the Browse button and select the image or images you want to upload.
- If desired, in the Description field, enter a brief description of the photo. If you are uploading more than one photo, the description will be applied to each photo.
- If you want to send a system-generated email notification about the upload to group members, select the Notify Members checkbox. The email notification will contain a link to the photo and will have the #photo-notice system hashtag. If you are uploading multiple photos, only one email notification is sent, with a separate link for each photo.
- Click or tap the Add button.
Note:
- If the Add Photos button is not available, one of these situations applies:
- The group has reached its storage limit.
- The album’s owner does not allow other members to add photos to the album.
- Members are not allowed to add photos to the group.
- The size limit for an uploaded photo is:
- 100MB in legacy Free groups
- 1GB in Premium and Enterprise groups
Restriction: This feature is available only in Premium groups, Enterprise groups, and legacy Free groups.
Group members can edit their own photos; group owners and moderators can edit any members’ photos. The edits members can make to a photo are limited to changing the name or description, rotating it right or left, and making it the album’s cover photo (if you also created that album). Only group owners and moderators can change the owners of photos.
To edit a photo:
- Display the photo you want to edit.
- At the bottom of the photo’s page, click or tap the Edit button.
- On the Edit Photo page, make your desired changes.
- Click or tap the Update button at the bottom of the page.
- In the Verify Update popup:
- If you want to send a system-generated email notification about the updated photo to group members, select the Notify Members checkbox. The email notification will contain a link to the photo and will have the #photo-notice system hashtag.
- Click or tap Yes to save the updated photo (and send an email to members if you selected the Notify Members checkbox).
Restriction: This feature is available only in Premium groups, Enterprise groups, and legacy Free groups.
Group members can move their own photos; owners and moderators can move any members’ photos.
To move a photo to a different album:
- Display the photo you want to move.
- At the bottom of the photo’s page, click or tap the Move button.
- In the Move Photo popup:
- Select the link of the album you want to move the photo to.
- If you want to send a system-generated email notification about the moved photo to group members, select the Notify Members checkbox. The email notification will contain a link to the photo and will have the #photo-notice system hashtag.
- Click or tap the Move button.
Note:
- The Move button is disabled if only one album exists.
- It is not possible to move photos around within an album.
Restriction: This feature is available only in Premium groups, Enterprise groups, and legacy Free groups.
Group members can delete their own photos; owners and moderators can delete any members’ photos.
To delete a photo:
- Display the photo you want to delete.
- At the bottom of the photo’s page, click or tap the Edit button.
- On the Edit Photo page, scroll to the bottom and click or tap the Delete button.
- In the Verify Delete confirmation popup:
- If you want to send a system-generated email notification about the deleted photo to group members, select the Notify Members checkbox. The email notification will have the #photo-notice system hashtag.
- Click or tap Yes to delete the photo (and send an email to members if you selected the Notify Members checkbox).
Restriction: This feature is available only in Premium groups, Enterprise groups, and legacy Free groups.
Group members can delete their own albums; owners and moderators can delete any members’ albums.
To delete an album:
- Open the album you want to delete.
- On the album’s page, click or tap the Delete Album button.
- In the Verify Delete popup:
- If you want to send a system-generated email notification about the deleted album to group members, select the Notify Members checkbox. The email notification will have the #photo-notice system hashtag.
- Click or tap Yes to delete the updated album (and send an email to members if you selected the Notify Members checkbox).
Tip: Another way to delete an album is to go to its Edit page and then click or tap the Delete button at the bottom.
Related help topic
Restriction: This feature is available only in Premium groups, Enterprise groups, and legacy Free groups.
To report a photo to the group’s moderators (for example, because you think it is not appropriate for the group) or to Groups.io Support (for example, because you think it violates the Groups.io Terms of Service):
- On the group’s website or in the the mobile app, display the photo you want to report.
- At the bottom of the photo’s page, click or tap the Report This Photo button.
- In the Report Photo popup:
- Enter the reason you are reporting the photo.
- Select Report to Moderators or Report to Groups.io Support, as applicable.
- Click or tap Report. An email message with the subject “Content flagged as inappropriate” is sent to the group moderators or to Groups.io Support. Your email address is included in that message.
Note: The member who uploaded the photo you reported is not notified about the complaint. It is up to the group’s moderators or Groups.io Support to determine how to act on your complaint.
Viewing the list of polls in a group
Exporting the results of a poll
Sending email to poll respondents
Restriction: This feature is available only in Premium groups, Enterprise groups, and legacy Free groups.
Groups.io provides a feature that members can use to create and respond to polls on a group’s website. Be aware that:
- Group owners determine whether the feature is available in their groups and, if it is, who can create new polls: all members or only owners and moderators.
- New and updated polls are sent to group members as messages with the system hashtag #poll-notice in the subject line. (If the hashtag does not yet exist in the group, it is created the first time a member posts a poll.)
- To vote in polls, members must log in to their Groups.io accounts. Members cannot participate in polls by email.
Restriction: This feature is available only in Premium groups, Enterprise groups, and legacy Free groups.
To view the list of polls in a group:
- On the group’s website, go to the Topics page.
- On the Topics page, click or tap the top left button (which is labeled Topics by default) and select Polls from the dropdown menu.
Tip: You can also search the archive by the #poll-notice hashtag. See Searching by hashtags.
Related help topic
Restriction: This feature is available only in Premium groups, Enterprise groups, and legacy Free groups.
To create a poll:
- Desktop browser: On the group’s website, in the left menu, click New Poll.
Mobile device: At the bottom of a group page, tap the More icon and then tap New Poll on the More menu.
Note: If you do not see a New Poll entry on the menu, then the Polls feature is disabled for that group, members are not allowed to create polls, or the group is a Free group that was created after August 24, 2020. - On the New Poll page, compose your poll:
- Enter a concise but descriptive subject line that identifies the poll.
- In the Question text editor box, enter your poll question.
- In the Answers section, enter the answers or choices that you want other members to vote for. To include more than three answers, click or tap the Add Answer button. To remove an answer, click or tap the X button at the far right on the answer’s line.
- Under Additional Options, select any of these other options that you want to apply to the poll:
- Allow multiple choices.
Select this checkbox if you want group members to be able to vote for more than one answer in the poll.
- Only moderators and poll creators can view results and respondents, regardless of whether the poll is open or closed.
Select this checkbox if you do not want group members to be able to view the results of the poll or who responded. This setting applies regardless of whether the poll is open or closed.
Note: Moderators must have the Edit Archives permission to be able to view poll results.
- Only display results when the poll has closed. Moderators and poll creators can always view results.
Select this checkbox if you do not want group members to be able to see the results of the poll while the poll is still open.
Note: Moderators and poll creators can view results at any time. Moderators must have the Edit Archives permission to be able to view poll results.
- Do not show who responded to the poll.
Select this checkbox if you do not want group members to be able to see who else responded to the poll.
Note: Moderators and poll creators can view responders at any time.
- Allow multiple choices.
- Click or tap the Post Poll button at the bottom of the New Poll page. Groups.io sends an email message to group members that contains the poll questions and a link to vote. The subject line of the email notification contains the #poll-notice system hashtag.
Related help topic
Restriction: This feature is available only in Premium groups, Enterprise groups, and legacy Free groups.
To edit a poll:
- Locate and open the poll you want to edit.
- On the poll’s page, click or tap More at the lower right.
- In the popup menu, select Edit Poll.
- Make your changes to the poll.
- Click or tap the Update Poll button at the bottom of the page. Groups.io sends an email message to group members to notify them that the poll was updated. The subject line of the email notification contains the #poll-notice system hashtag. Members can click or tap the link in the message to visit the poll and, if necessary, change their votes.
Note: Because polls are a form of group messages, edited polls display the blue Edited badge in the archive on the group’s website.
Related help topics
Restriction: This feature is available only in Premium groups, Enterprise groups, and legacy Free groups.
When you receive an email notification about a new poll, open the email message and click or tap the link labeled Click Here To Vote to go to the poll’s page on the group website. (If you are not logged in to your Groups.io account, you will need to log in before the poll’s page is displayed. See Logging in to your account.)
! Important: Do not reply to the email notification message. You cannot participate in group polls by email. If you reply to the email notification, your vote will not be recorded.
On the poll’s page, select the item (or items, if the poll allows multiple selections) you want to vote for, then click or tap the Vote button.
If you want to change your vote and the poll is not yet closed, go to the poll’s page, change your selection, and click or tap the Change Vote button.
Restriction: This feature is available only in Premium groups, Enterprise groups, and legacy Free groups.
Poll creators, group owners, and group moderators who have the Edit Archives permission can view the results of a poll:
- In the list of polls, locate the poll you are interested in and click or tap its subject line to open it on its own page.
- If the poll is still open for voting, click or tap the See Results link to display a list of the poll items and the number of votes each item received.
If the poll is closed, the results are displayed automatically. - To see who responded to the poll, click or tap the See Who Responded button in the list of results.
Related help topic
Restriction: This feature is available only in Premium groups, Enterprise groups, and legacy Free groups.
Note: Only owners and moderators can export poll results, to prevent potential harvesting of respondents’ email addresses.
To export the results of a poll (for example, so you can sort them):
- View the results of the poll and click or tap the See Who Responded button.
- On the Poll Responses page, click or tap the Export button at the bottom.
- In the Export Poll popup, select your preferred format (JSON or CSV). Then open or save the file of exported results.
Related help topic
Restriction: This feature is available only in Premium groups, Enterprise groups, and legacy Free groups.
Poll creators, group owners, and group moderators who have the Edit Archives permission can send email to the members who responded to a poll:
- View the results of the poll and click or tap the See Who Responded button.
- On the Poll Responses page, click or tap the Email button at the bottom and select the respondents you want to email. The Post To Member page appears.
- Complete the Post To Member page, then click or tap the Send To Members button.
The email is sent to the respondents you selected. Each respondent will receive an individual copy of the email that is addressed only to them; they will not see who else received the email.
Related help topic
Restriction: This feature is available only in Premium groups, Enterprise groups, and legacy Free groups.
Note: Only the poll’s creator, a group owner, or a group moderator with the Edit Archive permission can close or reopen polls.
Closing a poll
To close a poll so that votes are no longer accepted:
- Locate and open the message for the poll that you want to close.
- On the poll’s page, click or tap More at the lower right.
- In the popup menu, select Edit Poll.
- If desired, enter a statement about why you are closing the poll.
- Go to the bottom of the page and click or tap the Close Poll button.
Note: When you view the Polls page, an x icon appears to the left of polls that are closed. The icon appears only on that page.
Tip: If you do not need to edit the text of a poll when you close it, you can use this “shortcut” method to close the poll:
- On the Topics page or Messages page, click or tap the top left button (which is labeled Topics or Messages, depending on which view you are in) and select Polls from the dropdown menu.
- In the resulting list of polls, select the one you want to close.
- Click or tap the down arrow next to the desired poll and select Close from the dropdown menu.
Reopening a poll
To reopen a closed poll:
- Locate and open the message for the closed poll that you want to reopen.
- On the poll’s page, click or tap More at the lower right.
- In the popup menu, select Edit Poll.
- If desired, enter a statement about why you are reopening the poll.
- Go to the bottom of the page and click or tap the Reopen Poll button.
Tip: If you do not need to edit the text or options of a poll when you reopen it, you can use this “shortcut” method to reopen the poll:
- On the Topics page or Messages page, click or tap the top left button (which is labeled Topics or Messages, depending on which view you are in) and select Polls from the dropdown menu.
- In the resulting list of polls, select the closed poll that you want to reopen.
- Click or tap the down arrow next to the desired poll and select Reopen from the dropdown menu.
Restriction: This feature is available only in Premium groups, Enterprise groups, and legacy Free groups.
Note: Only the poll’s creator, a group owner, or a group moderator with the Edit Archive permission can delete polls.
You can use either of these methods to delete a poll:
- Open the poll message on its own page, click or tap More at the lower right, and select Delete Poll from the popup menu. Then, in the Verify Delete confirmation popup, click or tap Yes.
- View the list of polls, click or tap the down arrow next to the one you want to delete, and select Delete Poll from the dropdown menu. Then, in the Verify Delete confirmation popup, click or tap Yes.
Related help topic
Displaying a specific wiki page
Viewing a wiki page's revision history
Creating and editing wiki pages
Adding a table of contents to a wiki page
Adding, editing, or deleting wiki footers
Adding, editing, or deleting wiki sidebars
Restriction: This feature is available only in Premium groups, Enterprise groups, and legacy Free groups.
Groups.io provides a Wiki feature that members can use to view, create, and edit wiki pages on a group’s website. Example uses for a group wiki include (but are not limited to):
- Providing a repository of information that is relevant to the group—for example, project ideas for a woodworking club, recipes and cooking tips for a cooking club, a membership handbook for a social organization, and so on
- Documenting frequently asked questions and their answers
Note: Group owners determine whether the Wiki feature is available in their groups and, if it is, who can view, create, and edit wiki pages: the general public (view only), all group members, or only group owners and moderators.
Restriction: This feature is available only in Premium groups, Enterprise groups, and legacy Free groups.
Desktop browser: On the group’s website, in the left menu, click Wiki.
Mobile device: At the bottom of a group page, tap the More icon and then tap Wiki on the More menu.
Note: If you do not see a Wiki entry on the menu, then the Wiki feature is disabled for that group, members are not allowed to view the wiki, or the group is a Free group that was created after August 24, 2020.
Related help topic
Restriction: This feature is available only in Premium groups, Enterprise groups, and legacy Free groups.
Navigating around a wiki depends on how the pages are organized and linked. But a consistent method you can use to display a specific wiki page is to click or tap the Pages button at the top left of a wiki page, and then select the page you want to view from the list of wiki pages in the dropdown menu.
Related help topics
Restriction: This feature is available only in Premium groups, Enterprise groups, and legacy Free groups.
When you are viewing a wiki page, the date of the current version is displayed in the upper right corner of the page. You can click or tap that date to see the page’s revision history.
Tip: Another way to display the revision history is to edit the page and click or tap the Page History button at the bottom.
The History page lists the group members who have made revisions and the revision notes they entered. Click or tap a revision note’s link to see that version of the page.
To see how the page changed between two revisions listed on the History page, select the checkboxes next to the revisions you want to compare, and click or tap the Compare Revisions button at the upper right of the page. The resulting page highlights the changes that were made between the earlier revision and the later revision.
Note: You can select only two revisions at a time to compare.
Restriction: This feature is available only in Premium groups, Enterprise groups, and legacy Free groups.
Creating a wiki page
- Go to the wiki.
- Click or tap the gray ellipsis (...) button at the top and select New Page from the dropdown menu.
Note: If the button is not shown, group members are not allowed to create wiki pages. - Complete the new wiki page:
- In the first field, enter a title for the page. This title will appear in the gray navigation bar at the top of the wiki page and also in the list of pages displayed by the Pages button that is at the top of each wiki page.
- In the text editor box, enter and format the text of your wiki page.
- Under the text editor box, enter a short note explaining the purpose of the page. This note is optional but recommended because it will appear in the page’s revision history.
- If you are the group’s owner or a moderator and you want only moderators to be able to edit the page after it is created, select the Only moderators can edit this page checkbox.
Note: This checkbox does not appear unless you are an owner or moderator. - If you want to send a system-generated email notification about the new page to group members, select the Notify Members checkbox. The email notification will contain a link to the page and will have the #wiki-notice system hashtag.
Note: Owners and moderators who have opted to receive notifications about wiki changes always receive a notification when a new wiki page is created.
- Go to the bottom of the page and click or tap the Save Page button.
Editing a wiki page
- Go to the wiki and display the page you want to edit.
- Click or tap the gray ellipsis (...) button at the top and select Edit Page from the dropdown menu.
Note: If the Edit Page button is not available, group members are not allowed to edit the page. - On the editing page, make your changes, and enter a brief note explaining the edits. This note is optional but recommended because it will appear in the page’s revision history.
Note: Before May 5, 2020, wiki page titles were also used for the pages’ URLs. If you change the title of a wiki page that existed before May 5, 2020, existing links containing that page’s original title will break. As of May 5, 2020, wiki pages are assigned unique ID numbers that appear in page URLs and do not change if a page’s title is changed. - Go to the bottom of the page and click or tap the Save Edit button.
- In the Verify Edit confirmation popup:
- If you want to send a system-generated email notification about the edited page to group members, select the Notify Members checkbox. The email notification will contain a link to the page and will have the #wiki-notice system hashtag.
Note: Owners and moderators who have opted to receive notifications about wiki changes always receive a notification when an existing wiki page is updated. - Click or tap Yes to save the edited page (and send a notice to members if you selected the Notify Members checkbox).
- If you want to send a system-generated email notification about the edited page to group members, select the Notify Members checkbox. The email notification will contain a link to the page and will have the #wiki-notice system hashtag.
Text editing tips
You can set your preferred text editor (HTML, Markdown, or Plain Text) in your Groups.io account preferences (see Setting your preferred text editor). However, be aware that the editor you select will be used only on new wiki pages that you create. When a group member edits an existing page, the text editor they see will be the one that the page’s creator used, which might be different from the editing member’s preferred text editor.
In the HTML editor, you can easily add links to other wiki pages by clicking or tapping the Insert link to wiki page icon. That icon displays a popup containing a dropdown list of all the current pages in the wiki. From the list, you can select the page you want to link to.
In a desktop browser, in the HTML editor, you can display additional formatting options by clicking or tapping the ellipsis (...) on the left in the toolbar.
Restriction: This feature is available only in Premium groups, Enterprise groups, and legacy Free groups.
If a wiki page is lengthy, you can organize it into sections using headers, and then add a table of contents at the top of the page. Group members will then be able to click or tap a header link in the table of contents to go directly to that section on the page.
Note: These instructions assume you are using the HTML editor.
To add a table of contents to a wiki page:
- While you are creating or editing the wiki page, apply header elements to the section titles on the page because the table of contents is built from headers. To apply a header element, select the applicable header level from the Formats menu on the wiki editor toolbar:
- Desktop browser: Click the ... (ellipsis) button at the left to display an additional toolbar, then select a Header style from the list.

- Mobile device: Tap and hold the toolbar, scroll to the right until you see the Formats menu ("Paragraph" is the default format), then tap the menu and select a Header style from the list.
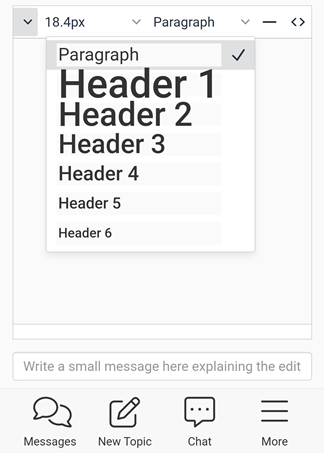
- Desktop browser: Click the ... (ellipsis) button at the left to display an additional toolbar, then select a Header style from the list.
- When you are ready to add the table of contents, click or tap the location in the page where you want to insert it (the table of contents does not have to be at the top of the page, although that location is typical), then select the Insert table of contents icon on the toolbar. See the examples below.
Desktop browser:

Mobile device:
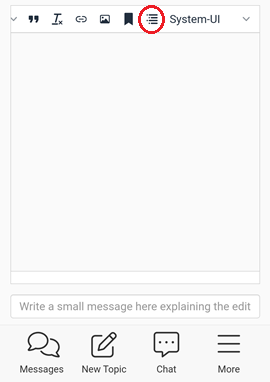
! Important: The location where you insert the table of contents should be a paragraph element with no additional formatting. That location should not be a header element or have any other formatting—otherwise, the format of the resulting table of contents will be affected accordingly. - In the Table of Contents popup:
- Enter a new title if desired (the default is “Contents”).
- Select the maximum level of headers you want listed in the table of contents.
- Click or tap Insert. The editor inserts a TOC code at the location where the table of contents will appear after you save the page. For example, the code [TOC: Contents: 3] specifies that the title will be “Contents” and three levels of headers will be listed.
- Go to the bottom of the page and click or tap the Save Page button. On the page, the table of contents appears where you inserted it.
Note: Heading numbers are added automatically, and you cannot change or remove them.
This wiki table of contents example shows two header levels:
In the example, the “Chorus Member Handbook” title above the table of contents is a paragraph element formatted with bold, italics, and a large font size. That title is not formatted as a header element because then it would also be listed in the table of contents, which could look odd to readers. You might have to experiment with the formatting and placement of titles and headers as well as the location of the table of contents to get the page to look the way you want it to.
Restriction: This feature is available only in Premium groups, Enterprise groups, and legacy Free groups.
About wiki footers
Members who are permitted to add and edit wiki pages can add a footer that will appear, with a gray background, at the bottom of every page in the wiki. The footer can contain content that you want to be consistent or prominent on every wiki page.
Adding a footer
- Go to any wiki page, click or tap the gray ellipsis (...) button at the top, and select Add Footer from the menu.
- On the new page, enter and format the content that will appear in the footer.
Note: Do not change the default name of the page (_Footer) or else the page will be just a regular wiki page. - (Optional) To send a system-generated email notification about the footer page to group members, select the Notify Members checkbox at the bottom. The email notification will contain a link to the page and will have the #wiki-notice system hashtag.
- (Optional) To restrict footer editing to group moderators only, select the Only moderators can edit this page checkbox.
- Click or tap the Save Page button at the bottom of the page. The footer is added and appears at the bottom of all pages in the wiki.
Note: After a footer is added to the wiki, the Add Footer menu item is still shown, but clicking or tapping it has no effect.
Editing a footer
Members who are permitted to edit wiki pages will see an edit icon ![]() in the upper right corner of the footer on wiki pages. They can edit the footer by clicking or tapping that icon.
in the upper right corner of the footer on wiki pages. They can edit the footer by clicking or tapping that icon.
Deleting a footer
To delete a footer, click or tap the edit icon ![]() in the footer’s upper right corner. On the Edit page, scroll to the bottom and click or tap the Delete Page button (in a desktop browser, the button is at the far right).
in the footer’s upper right corner. On the Edit page, scroll to the bottom and click or tap the Delete Page button (in a desktop browser, the button is at the far right).
Restriction: This feature is available only in Premium groups, Enterprise groups, and legacy Free groups.
About wiki sidebars
Members who are permitted to add and edit wiki pages can add a sidebar that will appear, with a gray background, on the right side of every page in the wiki. The sidebar can contain content that you want to be consistent or prominent on every wiki page. For example, the sidebar could serve as an index to the wiki by containing links to pages.
Note: On mobile devices, you will probably need to view wiki pages in landscape orientation to see sidebars in their intended location.
Adding a sidebar
- Go to the bottom of any wiki page, click or tap the gray ellipsis (...) button at the top, and select Add Sidebar from the menu.
- On the new sidebar page, enter and format the content that will appear in the sidebar.
Note: Do not change the default name of the page (_Sidebar) or else the page will be just a regular wiki page. - (Optional) To send a system-generated email notification about the sidebar page to group members, select the Notify Members checkbox. The email notification will contain a link to the page and will have the #wiki-notice system hashtag.
- (Optional) To restrict sidebar editing to group moderators only, select the Only moderators can edit this page checkbox.
- Click or tap the Save Page button at the bottom of the page. The sidebar is added and appears on all pages in the wiki.
Note: After a sidebar is added to the wiki, the Add Sidebar menu item is still shown, but clicking or tapping it has no effect.
Editing a sidebar
Members who are permitted to edit wiki pages will see an edit icon ![]() in the upper right corner of the sidebar on wiki pages. They can edit the sidebar by clicking or tapping that icon.
in the upper right corner of the sidebar on wiki pages. They can edit the sidebar by clicking or tapping that icon.
Deleting a sidebar
To delete a sidebar, click or tap the edit icon ![]() in the sidebar’s upper right corner. On the Edit page, scroll to the bottom and click or tap the Delete Page button (in a desktop browser, the button is at the far right).
in the sidebar’s upper right corner. On the Edit page, scroll to the bottom and click or tap the Delete Page button (in a desktop browser, the button is at the far right).
Restriction: This feature is available only in Premium groups, Enterprise groups, and legacy Free groups.
To delete a wiki page:
- Go to the wiki and display the page you want to delete.
- At the top of the page, click or tap the gray ellipsis (...) button and select Edit Page.
Note: If the button is not shown, group members are not allowed to edit or delete wiki pages. - Scroll to the bottom of the Edit page and click or tap the Delete Page button (in a desktop browser, the button is at the far right).
- When the Verify Delete popup appears:
- In the text box, enter I understand to confirm you are aware that the deletion cannot be undone. ! Important: There is no way to recover a deleted wiki page.
- (Optional) To send a system-generated email notification about the deletion to group members, select the Notify Members checkbox. The email notification will have the #wiki-notice system hashtag.
- Click or tap Yes to delete the page (and send an email to members if you selected the Notify Members checkbox).
If you see a Sponsor This Group button on a group’s home page, the group’s owner has enabled a feature that allows members to contribute towards the costs of hosting the group on Groups.io.
To sponsor the group:
- Go to the group’s home page and click or tap the Sponsor This Group button.
- On the Sponsor Group page, in the Amount field, enter the amount you want to sponsor. It must be at least $5.00 US.
- Provide your payment information. You can pay using a credit card or debit card or through PayPal, Apple Pay, or Google Pay.
You will receive an automated receipt by email. You might also receive a separate notice from the group, if it has set up an automatic member notice for group sponsorships.
Your sponsorship history and your credit or debit card information (if you paid that way) are saved on the Billing page in your Groups.io account. You can change or delete your credit or debit card information at any time. For more information, see Reviewing your group donation and payment history.
Note:
- Sponsorships are nonrefundable and not tax deductible. Sponsorship amounts are held by Groups.io and are used to pay hosting fees as needed.
- The entire amount of a sponsorship is added to the group’s sponsorship reserve (that is, no processing fees are deducted from it). The amount you enter is the amount you will see in your credit, debit, or PayPal account.
Restriction: This feature is available only in Premium and Enterprise groups.
Owners and moderators of Premium and Enterprise groups can set up donation requests to ask their members to donate to the group. If a group you belong to has an open donation request, you will see a Donations entry near the bottom of the left menu at the group’s website and on the More menu in a mobile browser or the mobile app.
To make a donation:
- Desktop browser: In the left menu on the group’s website, click Donations.
Mobile device: In the group, tap the More icon, then select Donations on the More menu. - On the View Donation page, in the Donate Now field, enter the amount you want to donate.
- In the Credit Or Debit Card field, enter your credit or debit card number, its expiration date, and its CVC code.
- Click or tap the Donate button.
Your donation history and your credit or debit card information are saved on the Billing page in your Groups.io account. You can change or delete your credit or debit card information at any time. For more information, see Reviewing your group donation and payment history.